Tag Archives: recipe

Apr
11
2012
Marshmallow Peep Ice Cream

I’ve always liked Marshmallow Peeps. I’m a sugar junkie, so what’s not to like? I’m partial to the bunnies because I like biting their ears off.

The Washington Post’s Peeps diorama contest is now one of my favorite parts of Easter. While I’d love to create a diorama made of Peeps, I’m not that crafty. Plus, I’d rather just eat them. So, I created my own edible art this year. I am the artist…and ice cream is my canvas.

In honor of Easter, I made Marshmallow Peep ice cream, my first real attempt at ice cream recipe development. It turned out pretty well. The texture of the ice cream is nice and smooth and the chunks of Peeps added at the end provide a little more visual interest and extra marshmallow flavor. Yes, Peeps were hurt in the making of this ice cream.

I'm a sick bastard.

I was a little underwhelmed by the marshmallow flavor, sort of reminiscent of marshmallow, but maybe a sweeter version of vanilla if you didn’t know the flavor before eating. It’s tasting more like marshmallow as the extra Peeps start to melt into the ice cream. I’d like to experiment with adding more marshmallow and maybe toasting it to enhance the flavor.

Marshmallow Peep Ice Cream

NOTE: I do everything by weight, so “ounces” refer to weight measurement, not volume (fluid ounces)

Makes about 1 quart

Ingredients:

10 ounces heavy cream

11 ounces whole milk (meant to do 10 but forgot I needed to use milk to make a cornstarch slurry,  11 oz. worked fine)

6 ounces evaporated milk

1.5 ounces sugar

6 ounces Peeps

1 tablespoon cornstarch

1 tablespoon vanilla extract

chopped Peeps to mix in (I chopped one “row” each: yellow bunnies, green chicks, and orange chicks, which yielded more than enough)

  1. Combine 1 ounce of the milk with the cornstarch until blended and set aside.
  2. Heat heavy cream, the remaining milk, evaporated milk, and the sugar over medium heat in a heavy saucepan until it starts to gently boil. Gently boil for about 4 minutes.
  3. Turn off the heat and mix in the Peeps until they melt (laugh maniacally).
  4. Slowly whisk in the cornstarch mixture.
  5. Return the mixture to a boil over medium heat, boil for 1 minute while stirring.
  6. Strain the mixture into a gallon size freezer bag, seal, and submerge into an ice bath until about 40 degrees (about 30 minutes).
  7. Add vanilla to the ice cream mix, then freeze in an ice cream maker.
  8. Forget to chop extra Peeps until five minutes before ice cream is done freezing. Hack at Peeps in a blind fury.
  9. Mix chopped Peeps into the ice cream (doing this in a pre-chilled bowl helps keep the freshly made ice cream from getting too melty) and then pack into a freezer container and freeze for several hours.

FYI: While it might be tempting to use regular marshmallows for the mix instead of Peeps, don’t do this. Store-bought marshmallows contain a shitload (technical term) of cornstarch. While a little cornstarch in ice cream is good (it reduces iciness), the amount of cornstarch in a 10 oz bag of marshmallows produces a glue-like mix and a congealed, rubbery mass of frozen “ice cream.” Not that I would know that first hand or anything. Let’s just say I have discovered the perfect “prop” ice cream – useful for photography and TV and film. It looks like ice cream, but doesn’t melt — ever. If you don’t want to use Peeps, you could always make homemade marshmallows to avoid the cornstarch problem, or try Marshmallow Fluff.

Nov
4
2011
Photo Friday (and Recipe!): Toblerone Shortbread

Are any of your family members living away from home? Do you imagine them lonely and longing for homemade treats?

Maybe you want to send them a care package, but don’t know what might ship well?

Perhaps you are lazy, but want to seem giving and skilled at baking?

Make Toblerone Shortbread!

I settled on this recipe for my oldest nephew’s first college care package last year. I figured shortbread would be sturdy and not subject to getting stale while in transit. And there are four Toblerone bars on top and I love Toblerone. In fact, I’m angry with myself for not thinking of adding Toblerone to a baked good myself.

I had my first Toblerone bar in Geneva during my college study abroad semester. I also left my roommate alone in a 40-year old man’s hotel room in Geneva. Alone in the hostel that night, sleep didn’t come easy (although it should have because I didn’t have to hear my roommate’s horse-like snoring) as I imagined what I’d say when calling her parents to inform them their daughter was missing. Or chopped up into bits, which would now, ironically, be an appropriate size for sprinkling on top of shortbread. Luckily she came back unscathed the next morning and I can focus my memories of Switzerland on what is really important–chocolate.

The hardest part of this recipe is getting the dough evenly spread in a 9- x 13-inch pan. I always give up and have thinner edges. These edges are unattractive and thus have to be cut off and eaten by the baker. It’s a rule.

As it turned out, my nephew had never had Toblerone before I sent him these bars last year and he loved them. So I made them for him again last weekend, because I’m giving and skilled at baking. And I’m childless and want visitors when I’m in the nursing home.

RECIPE

Candy Bar Shortbread from A Passion for Baking by Marcy Goldman

1 cup unsalted butter, softened

2/3 cup sugar

2 1/4 cups all-purpose flour

pinch salt

4 (3.52-ounce) Toblerone bars, coarsely chopped

1. Preheat oven to 325 degrees. Ms. Goldman says to stack two baking sheets together and line the top sheet with parchment, but I don’t do that because it’s crazy. But you go ahead and do what you have to do.

2. In a mixer bowl, cream butter and sugar. Add flour and salt and mix to make a stiff dough that does not quite hold together.

3. Pat dough into a 9- x 13-inch pan lined with parchment paper (I make the parchment paper into a sling that I can then use to pull the bars out of the pan for easier cutting). Curse when you are unable to spread the dough evenly across the whole pan.

4. Bake until lightly golden (get ready for the best part…), 25 to 40 minutes. Get annoyed that she gives you a FIFTEEN minute range in baking times and make a snide comment to your husband about recipe development.

5. Sprinkle chopped Toblerone on hot uncut shortbread.

6. Let set for about 5 minutes and then spread melted Toblerone over shortbread (I use a small offset spatula).

7. Cut into small squares (I usually get about two dozen, including the thin edges I eat myself).

8. Put cookies in the fridge or freezer to set up.

I always become alarmed at the way the Toblerone oozes off of the cut shortbread edges, so I use the parchment paper sling to slide the cut bars back into the pan before putting the whole pan into the fridge. Of course, then I sort of have to cut the bars again, because the Toblerone spackles the cut bars back together as it hardens.

Pack the cookies and a couple of extra Toblerone bars and send to your ungrateful nephew who’s having far too much fun at college to ever acknowledge the arrival of a package.

Forget to take a picture of the finished bars before you pack up all the good-looking ones. Share a picture of a homely edge piece.

Jul
9
2011
Mississippi Mud Bars

Years ago, I got some sample Mr. Food ooh-so-easy Recipe Collection cards in the mail. The free cards were supposed to entice me to purchase the rest, but I simply kept the one for Rocky Road Fudge Brownies. I remember liking them a lot and they were quite easy to make since the recipe used boxed brownie mix and mini marshmallows.

I’m snobbier about my recipes these days. I recently got a great new baking cookbook called A Passion for Baking by Marcy Goldman. The Candy Bar Shortbread recipe (topped with Toblerone) was worth the price of the book by itself. But when I flipped through the book and saw the photo of Mississippi Mud Bars, I became obsessed. The picture looked sinful and I was dying to try them. They were like Mr. Food’s recipe only completely from scratch, so they had to be better, right? Plus, the description asserted “this is a definitive, perfected version.” Alrighty then!

But I never seemed to have an appropriate occasion for making them. Dave and I need to eat a whole pan of these things like we need a hole in the head. Over July 4th weekend, we were invited to an all-American themed potluck and cookout. Yee-ha! Mississippi is American!

MY NOTES ABOUT THE RECIPE (also noted below with *)

These were pretty easy to make. There is some chilling involved before you can frost them, so you need to schedule for that. I also had to buy a new pan (11- x 7-inch), a size I haven’t needed before this recipe and don’t see needing again. The pan looked so wee, but it produced plenty of bars. Goldman, for reasons I don’t fully understand, likes to blend batters and icings in a food processor. Apparently she is not aware of how annoying my food processor is to clean. I used my mixer.

The most difficult part was getting the bars out of the pan since I didn’t want to cut them in the pan. I was able to get it out onto a cutting board in one piece using a big spatula after loosening all sides with a plastic knife (didn’t want to scratch my brand new pan). If I ever make these again, I’ll line the pan with a foil sling to make removing the uncut bars easier. I made Dave cut them since getting 32 bars out of an 11 x 7 sized slab of marshmallow-spackled and frosted brownie was a messy game of Tetris I didn’t want to play.

Dave and I each tried one still cold from the fridge and they were so sweet I felt stoned. I have a very serious sweet tooth, and these things were approaching too sweet even for me. The comments I got at the potluck seemed to signal the same thing–over the top rather “ooh, it’s so good” (to steal Mr. Food’s phrase). They tasted considerably better to me once they came to room temperature. So even though they are very messy, I strongly suggest NOT serving them cold.

RECIPE

Bars

2 cups sugar

3/4 cup unsalted butter, cut into chunks

4 large eggs

2 teaspoons pure vanilla extract

1 1/2 cups all-purpose flour

1/3 cup cocoa powder, measured and then sifted (*I refused to sift a third of a cup of cocoa, I mean…seriously)

3/4 teaspoon baking powder

pinch baking soda

1/8 teaspoon salt

1/2 cup chopped walnuts, optional (*I used and would strongly recommend otherwise there will be nothing blocking the sugar rush from killing you)

1/2 cup semisweet chocolate chips (*I used my new standby, Hershey’s semisweet)

1 1/2 cups shredded coconut, optional (*didn’t use)

1 (7 oz) jar marshmallow creme

Icing

3 cups powdered sugar (*I ended up blending in close to 3/4 cups more because it just didn’t seem to be getting sufficiently stiff (heh-heh))

1/2 cup unsalted butter, softened

1 teaspoon pure vanilla extract

1/2 cup cocoa powder, measured and then sifted (*sift if you want, see if I care)

1/2 cup evaporated milk

Steps

Preheat oven to 350. Generously spray an 11- x 7-inch pan with non-stick cooking spray and place it on a parchment-paper lined baking sheet (*the author has her reasons for this which I don’t think are necessary, but I did it anyway because I worried the batter might spill over–it didn’t).

Blend sugar and butter until pasty. Add eggs and vanilla; blend well. Fold in flour, cocoa, baking powder, baking soda, and salt and blend well. Fold in nuts, chocolate chips, and coconut (*ick!) and blend briefly. Spoon into prepared pan.

Bake until set and firm to the touch, 25-30 minutes (*I baked close to 30 minutes and wish I’d done a little less). Spread marshmallow creme on hot cake and refrigerate, uncovered, 3 or more hours.

For icing, blend all ingredients until stiff and glossy. Using a metal spatula, spread icing on chilled uncut bars. Chill to set icing. Cut into bars (*good luck with that!).

Feb
6
2011
Perfect Chocolate Chip Cookies?

I’ve never been fully satisfied with any chocolate chip cookie recipe I’ve ever tried. My search for a perfect homemade chocolate chip cookie has been going on for years. My mother-in-law made excellent chocolate chip cookies. I remember fondly the care packages she sent to Dave filled with these thick, chewy, beautiful cookies, both because I never received care packages myself (I was so deprived!) and because her cookies were so good. I wonder if she knew that the reason I had tried them is because I stayed in Dave’s room a lot of the time (scandalous!)? When I asked her for the recipe, she said she used the Nestle Toll House recipe on the back of bags of Nestle morsels. However, when I tried that recipe, it did not yield her cookies. I tried probing to see if she did anything special that she wasn’t spilling and she insisted she just followed the recipe.

Since then I’ve done some research and have tried various other recipes. While I’m not going to say that the cookies I made were bad (most chocolate chip cookies are pretty tasty, but we’re talking about finding “the one” here), the recipes I tried weren’t yielding what I wanted, a rich and chewy cookie. It’s also important to me that the cookies have some heft to them, that they don’t spread out and get too thin.

One recipe that seemed very promising was Alton Brown’s “The Chewy.” While the chewy was good, it wasn’t my perfect cookie. While people seem to agree that melted butter is a key to chewy cookies, these cookies came out very greasy to the touch. They were also flatter than I wanted.

The next really promising recipe came from David Leite’s 2008 NY Times article. I was very excited about this recipe. Leite was essentially doing the same thing I was doing, searching for the perfect chocolate chip cookie, but he had access to all kinds of resources (well-known and accomplished bakers) I didn’t have. The fact that he published a recipe must have meant he’d found the perfect cookie, right? Well, they weren’t the perfect cookies for me. These cookies were good right out of the oven, but were nothing special at all once they had cooled. By the next day, they were dry and lacking in flavor. They actually weren’t even worth the calories (looking back on the recipe in my disappointment, I realized that Leite himself had essentially said as much in the recipe–“eat warm”). The cookies were better if you reheated them a bit, but I didn’t feel that they were worth making again. I hadn’t found the perfect chocolate chip cookie.

It has been a couple of years since I tried making chocolate chip cookies. Then two weekends ago we saw an America’s Test Kitchen episode with the rather pompously named “Perfect Chocolate Chip Cookies.” A lot of what I had already learned matched their recipe, with a few new twists. It seemed worth a try. Four things caused me some concern:

1.  the melted butter would yield greasy cookies (a la the chewy),

2.  browning the butter would be a pain and would make the cookies taste burnt (on the show they were so busy discussing the depth of flavor browned butter adds that I think they weren’t paying enough attention because all I was seeing was burnt butter…I actually think they made a mistake on the show, because the picture on their website doesn’t show butter that dark)

3. the recommended chocolate chip wouldn’t appeal to my tastes

4.  the enormous size/ridiculously low yield

I don’t care how big a cookie is, a yield of 16 cookies isn’t worth my time. Also, their insistence on having to make monstrously-sized cookies in order to obtain that elusive chewiness seemed like a cop-out to me. It implied to me that they had not actually perfected a technique that yields chewy cookies. If they had a perfect chewy cookie technique, why couldn’t you use that technique to make normal sized cookies that would be chewy?

Last weekend, I made these cookies. I solved concerns 3 and 4 by doubling the recipe. Doubling the recipe meant I’d get a non-laughable yield and it meant I could use their recommended chocolate chips in half of the dough and good old Nestle Toll House morsels in the other half (Just like the Test Kitchen, I’m a little bit of a chocolate snob too, but I started wondering if the missing link in duplicating my mother-in-law’s cookies was actually the chip. I usually use fancier chocolate chips and I’m sure she just used Nestle-so that seemed worth a try). So there would be a chocolate chip competition thrown in too.

The first step was the dreaded browning of the butter. I was very worried that their instructions would yield burnt, unusable butter but as it turned out I had trouble getting any color on the butter whatsoever. Even though Dave is a fabulous chef, we don’t actually have the pan they suggest for this task (10 inch skillet that is not dark or nonstick), so I ended up having to use a saucepan. The saucepan provided less surface area for cooking. That, plus having double the amount of butter (since I was doubling the recipe), seemed to stop the butter from browning. After going a couple of minutes over their maximum suggested time for the browning, I freaked out and just stopped because I had this vague recollection from watching the show that they had said  the reason they stir a few more tablespoons of solid butter into the stuff that has been melted is due to evaporation during the melting. I worried that I wasn’t going to have the right amount of butter if I kept it on the heat any longer. So check out this flavorful browned butter…

Other than that, everything went fine. I thought the added steps of waiting for the sugar to dissolve might be annoying, but it didn’t take long and seemed necessary (the batter certainly didn’t look ready for the dry ingredients after the first whisk). The next two pictures are of the result of the first whisk of butter and sugar and then what the mixture looked like right before adding the dry ingredients.
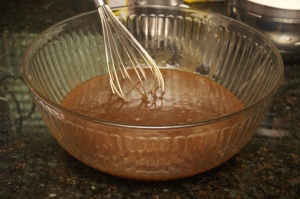
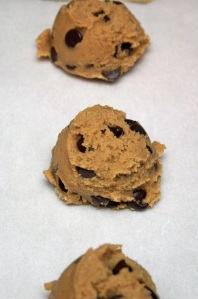
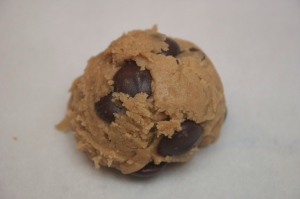
I almost forgot to split the finished dough in half to mix different chocolate chips in, but remembered just in time. We had the right size scoop (3 tablespoon) so portioning the dough was super easy. I ended up making the appropriate number of what I started calling “Dave’s cookies,” but only got 15 of “my cookies.” Dave’s cookies had the dark Ghirardelli chips mixed in and mine had the Nestle morsels. The next two pictures are a batch of my cookies waiting to go into the oven and a cute singleton of Dave’s dough. I started calling the cookies “mine” versus “Dave’s” because I know Dave likes dark chocolate and I generally don’t and I confirmed that through sampling some chips during the whisking and waiting steps. I really wasn’t wild about the dark chips, while the Nestle just tasted like normal chocolate chips to me.
I baked each sheet of cookies for about 11 minutes, which seemed perfect. I also got them the hell off the cookie sheets to cool immediately because I didn’t want them to continue baking. Here is a batch baking in the oven and what they looked like after I moved them to the cooking racks.


So what was the verdict?

I ate one of my cookies when they were still pretty warm. It tasted good, but was pretty greasy (like the chewy). A few hours later I had another and it was just lovely. The butter must have solidified or reabsorbed or something because they weren’t greasy any longer. I was saying to Dave that they reminded me of something when it hit me–his Mom’s cookies! Strange, because I know she didn’t melt her butter or use dark brown sugar or any of these other recipe changes. But they are the closest thing I’ve found to her cookies. Maybe the size mattered; my memory of her cookies is that they were pretty large. I froze most of the cookies the first night. We ate some of what I hadn’t frozen the next night and they were still very good at room temperature. The next night they were starting to get a little dry but were still good. Since then, we have reheated a couple from frozen and they are about as good as freshly baked that way (it is key to use a low power level on the microwave otherwise the cookie regains that fresh out of the oven greasy quality, you want the cookie thawed and maybe a little warm, but not hot).

What about the chip test?

Dave strongly preferred the Ghirardelli dark chips. While I liked the dark chips better in the finished product than when I tried them raw, I strongly preferred the Nestle. I’m sure there are better chips than Nestle, but I just don’t care for dark chocolate. I prefer semi-sweet or even milk chocolate. After deciding for myself, I checked the Test Kitchen’s website and read their chocolate chip reviews. I could tell just from the first line of their review of the “highly recommended” Ghirardelli that they are not for me:  “Distinct “wine,” “fruit,” and “smoke” flavors made this “adult chocolate” a clear winner.” The Test Kitchen tasters hated the Nestle chips and rated them as “not recommended.” They noted the high sugar content and said they were “unpleasantly sweet.” I guess this is just further confirmation that I have the palate of a 5-year old, because a.) I’m not sure I’ve ever tasted anything “unpleasantly” sweet; sweet is an inherently pleasant flavor to me and b.) if having an “adult” palate means I have to want my chocolate to taste like wine, fruit, and smoke (I mean, smoke…really?), I’ll just stick to being childlike.

But in reading their reviews of other chips, I think the Hershey’s semi-sweet might be a good option for me to try next time. While the description doesn’t make it sound like the tasters liked them, they did rate them as “recommended.” Their biggest concerns were that they were “too sweet” and had “a distinct “milky” flavor…more similar to milk chocolate than semisweet chocolate.” But the tasters thought they had “good cocoa flavor in cookies.” Those chips totally sound like a good fit for me.

Summary: I wanted to shove my face in the dough the whole time I was making these cookies. Writing this post and looking at these pictures again makes me want to go get another cookie out of the freezer. Not sure that they are “perfect,” but they are the closest I’ve found so far. I will totally make these cookies again. Next time, I think I’ll use Hershey’s chips in my batch and that I will brown the butter for the two batches separately to try to get the browning the recipe calls for.

“Perfect Chocolate Chip Cookies” From Cook’s Illustrated.

Makes 16 cookies.

Avoid using a nonstick skillet to brown the butter; the dark color of the nonstick coating makes it difficult to gauge when the butter is browned. Use fresh, moist brown sugar instead of hardened brown sugar, which will make the cookies dry. This recipe works with light brown sugar, but the cookies will be less full-flavored.

Ingredients
1 3/4  cups unbleached all-purpose flour (8 3/4 ounces)
1/2     teaspoon baking soda
14       tablespoons unsalted butter (1 3/4 sticks)
1/2     cup granulated sugar (3 1/2 ounces)
3/4    cups packed dark brown sugar (5 1/4 ounces) (see note)
1         teaspoon table salt
2        teaspoons vanilla extract
1        large egg
1        large egg yolk
1 1/4  cups semisweet chocolate chips or chunks (they recommend Ghirardelli 60% Cacao Bittersweet Chocolate Chips)
3/4     cup chopped pecans or walnuts, toasted (optional)

Instructions

1. Adjust oven rack to middle position and heat oven to 375 degrees. Line 2 large (18- by 12-inch) baking sheets with parchment paper. Whisk flour and baking soda together in medium bowl; set aside.

2. Heat 10 tablespoons butter in 10-inch skillet over medium-high heat until melted, about 2 minutes. Continue cooking, swirling pan constantly until butter is dark golden brown and has nutty aroma, 1 to 3 minutes. Remove skillet from heat and, using heatproof spatula, transfer browned butter to large heatproof bowl. Stir remaining 4 tablespoons butter into hot butter until completely melted.

3. Add both sugars, salt, and vanilla to bowl with butter and whisk until fully incorporated. Add egg and yolk and whisk until mixture is smooth with no sugar lumps remaining, about 30 seconds. Let mixture stand 3 minutes, then whisk for 30 seconds. Repeat process of resting and whisking 2 more times until mixture is thick, smooth, and shiny. Using rubber spatula or wooden spoon, stir in flour mixture until just combined, about 1 minute. Stir in chocolate chips and nuts (if using), giving dough final stir to ensure no flour pockets remain.

4. Divide dough into 16 portions, each about 3 tablespoons (or use #24 cookie scoop). Arrange 2 inches apart on prepared baking sheets, 8 dough balls per sheet. (Smaller baking sheets can be used, but will require 3 batches.)

5. Bake cookies 1 tray at a time until cookies are golden brown and still puffy, and edges have begun to set but centers are still soft, 10 to 14 minutes, rotating baking sheet halfway through baking. Transfer baking sheet to wire rack; cool cookies completely before serving.

LOGY EXPRESS NOTE: I slid the cookies, parchment and all, off the cookie sheets onto cooling racks immediately on taking them out of the oven, because I didn’t want them to keep baking and because I only have two appropriately sized cookie sheets and needed to reuse each for the second batch of dough. After a few minutes, they were set enough to GENTLY slide them off of the parchment if you want to reuse your parchment.

Nov
21
2010
How to Make Buckeyes

The 2010 buckeye making is complete. It didn’t seem quite as bad as usual. Making the dough the night before was a good idea. That took about an hour on Friday (it took longer because I was taking pictures and had to set up the camera, etc…). Then I spent between 5 and 6 hours on the buckeyes on Saturday. It’s a commitment.

Here are the ingredients. Healthy-looking, no?

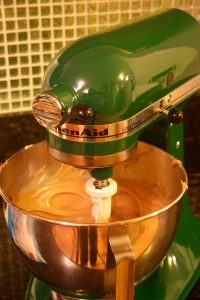
The first step is to mix the softened butter and peanut butter together. Not that this picture is critical, but because I love my green mixer, here is what the peanut butter and butter look like after they are mixed together.

Adding the powdered sugar is where this gets interesting. Every year I try to use the mixer to get as much of the 3 pounds of sugar into the dough as possible and every year I have to give up and use my hands to knead the last pound or so. I hate having to knead the dough by hand so I like to take the mixer part right to the brink of buckeye dough explosion. The dough in the next picture is trying to make a break for it. Thankfully, this year I made considerably less mess and inhaled considerably less powdered sugar than usual. Dave thinks I might be able to get all the sugar mixed in if I had the larger 6-quart Kitchen Aid, but they don’t make it in green, so that’s not an option.

Here is what the dough looks like with all the powdered sugar almost fully incorporated. I chilled the dough overnight since I planned to roll the buckeyes the next day. After I took the dough out of the fridge, it took about an hour for the dough to warm up enough to roll.

The recipe I use says that the rolling “takes forever, so turn on a good movie and begin to roll balls.” The first few years I made buckeyes, I fought the movie-watching suggestion. I was worried about spilling dough in the living room and didn’t want the process to take any longer than it had to. But you end up standing for hours to dip the buckeyes, so it’s silly to stand for rolling when you can sit and be entertained by something else. The first year I took the movie suggestion, I chose “The Lion, the Witch, and the Wardrobe.” That wasn’t a good selection. Some crying took place during that movie, which interfered with the rolling. This year I watched “Marie Antoinette,” which save for a scene in which they take away her dog, was a tear-free choice.

The recipe also says to “try not to eat too many during the movie.” I have never been even remotely tempted to stick a piece of buckeye dough sans chocolate coating into my mouth. But if that turns you on, go for it, who am I to judge? The rolling took me about 2 hours and 45 minutes this year, but I was distracted by the movie. I think I’ve been able to do this in 2 hours before.

My favorite part of the recipe is the uselessness of the instruction on size. The recipe calls for the dough to be rolled into balls that are “buckeye size.” I use a small ice cream scoop (size 70) to portion out the dough. The recipe says it yields about 100-120 buckeyes, but I have always gotten about 12 dozen. My feeling is that if you are going to go through all this work, you might as well try to get as many buckeyes as possible. This year I made 138 buckeyes and I think they are plenty big. Here they are—chilling before their chocolate dip.

The recipe calls for melting chocolate chips with some paraffin. The first year I made them, I followed this suggestion and they tasted fine. But because mixing wax into my food freaked me out and also because I like to make things more difficult, the next few years we tempered chocolate for the dipping. I say “we” because I needed Dave’s help to do this. So then we were both cranky. Then we moved on to trying to melt chocolate chips without breaking their temper. Don’t do this, you will want to kill yourself. To avoid breaking the temper, you have to keep the chocolate at a temperature which won’t allow the chocolate to get thin enough to dip the balls easily. And it takes forever to melt chocolate chips this way (if you try to do it faster the temperature will get too high and then the chocolate won’t set up after dipping the balls). Now I use milk chocolate melting caps from Romolo’s. Romolo’s is a handmade chocolate shop in my hometown that I visit pretty much daily every time I’m in Erie. The caps melt easily and the buckeyes are just as good dipped in this chocolate. In fact, several people actually noticed the difference and said the buckeyes were better this way. So yea, Romolo’s!

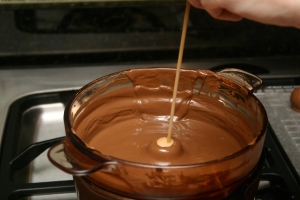
Once the chocolate is melted, you can dip the chilled balls. I use a wooden skewer for the dipping and a second skewer to ease the dipped buckeyes onto wax paper. The second skewer becomes less necessary the more the balls soften. When the balls get too soft, they’ll dive right back into the chocolate before you can get them to the wax paper, which is not at all annoying. The dipping took me 2.5 hours this year. Here is a ball getting its buckeye chocolate dip.

I tested one the night I made them and it was perfectly fine. But the magic of eating them is gone for me. All I taste is my effort, if that makes any sense. Here is a shot of the buckeyes resting before I packed them for freezing.

Here is the recipe.

BUCKEYES

1 lb. butter, room temperature

2 lbs. peanut butter, creamy

3 lbs. powdered sugar

******

2 bags chocolate chips (NOTE: I used slightly less than 3 bags—1 lb. each—of Romolo’s milk chocolate melting caps)

2-3 oz. paraffin (NOTE: I don’t use this)

******

1.) Cream peanut butter and butter together. Gradually add powdered sugar and mix well. By the end you may need to use your fingers and knead it to get it all mixed.

2.) Roll mixture into balls* – buckeye size. Makes between 100-120 balls. Refrigerate balls for at least an hour. They dip better when chilled.

EDITED 12/4 to ADD: Just saw that someone found this post by searching on “buckeye recipe keep in freezer until ready to dip in chocolate.” Maybe it won’t matter if you use paraffin, but I strongly recommend not freezing the undipped buckeyes. We did that one year to save space in the fridge, and the condensation on the balls as they thawed messed up the chocolate when we started dipping (water and melted chocolate don’t like each other).

3.) Melt chocolate and paraffin in a double boiler. Test your chocolate by dipping one ball and letting it sit for 5 minutes. If the chocolate has set, your chocolate is ready. Continue to dip balls by using a square toothpick (thick ones). Press toothpick into chilled balls and dip into chocolate leaving an eye opening on top to look like a buckeye. Then, take another toothpick to gently press perpendicular to the toothpick in the buckeye to slide it off onto wax paper.

4.) Chill dipped buckeyes until firm (NOTE: if your chocolate is tempered properly this is unnecessary). Then, line the buckeyes in containers with wax paper between layers and keep in the freezer until ready to serve.

*Note: this takes forever, so turn on a good movie and begin to roll balls—try not to eat too many during the movie.