Tag Archives: domestic stuff

Dec
7
2011
Homemade Advent Calendar*

Preparing My Heart for Christ with Belgian Chocolate

I’m sure you’ve all been wondering how I spent my free time in November. I spent it making advent calendars for me and Dave. Heads up for the devout among you, this has nothing to do with preparing my heart for the coming of Christ and everything to do with preparing my mouth for a daily piece of delicious chocolate (sanctioned by Jesus!).

Because I’m a 5-year old trapped in a 38-year old body, I get a Neuhaus advent calendar every year (two because I don’t want to share with Dave). I love the designs on the front and the anticipation of opening the little paper door to reveal my surprise treat each day…until the day when I’m greeted by a piece of dark chocolate. Then my 5-year old palate wrinkles its nose.

In past years, I’ve toyed with the idea of making my own advent calendar so I can fill it with chocolates of my choosing. But I’m lazy and not even remotely crafty.

But early in November, my ADD took over and I searched the internet for homemade advent calendar ideas. Because that was the best use of my time. Oh how my to-do list suffers when I get one of these brilliant “project” ideas.

This homemade advent calendar idea resonated most with me. But I think I might have mentioned I’m lazy? So I thought about buying these pre-made tins on Etsy. But as lazy as I am, I’m also cheap and picky. Since I want to retire early and have super cute tins, I decided to make my own in my voluminous free time.

This is the part of the craft project blog post where I’m supposed to say how easy this project was. This was a raging pain in the ass so easy. I started this nonsense during the first week of November and I didn’t finish until December 1st, which is actually four days after advent started, but who’s counting. Advent calendars always start on December 1st, I don’t make the rules. I stopped counting the time this project took when it reached 12 hours.

Now is the time in the craft project blog post when I’m supposed to tell you how to torture yourself do this.

“High-Maintenance Homemade Advent Calendar” Steps:

1.) Buy shit:  Having no crafting experience, this involved making a non-technical shopping list (i.e. paper cutter thingie, stuff to make paper stick to the tins, way to make numbers appear on the paper, etc…) and losing my Michael’s virginity. The only reason I didn’t leave in a huff when the cashier asked for $99 (seriously?!?) was that I’d already blown an hour and half wandering around the store in a stupor. I was by that point what I like to call committed.

2.) Design and cut (with fancy new circle cutter I can’t imagine ever using again as long as I live) two decorative paper circles for each tin. Curse each time the paper slipped and the cutter created a useless ellipse.

3.) Realize cutting circles out of the paper wastes a ton and return to Michael’s for two more packages.

4.) Tape (using special tape I had to order) smaller decorative paper circles onto larger background circles.

5.) Freak out about something happening to the paper given how much time steps 1-4 took. Research paper preservation products. Select acrylic sealer spray.

6.) Decide not to number the circles. Hope no one ever dares to question this decision. Thank you.

7.) Obsessively worry about my spraying competence and ruining my precious circles. Become frightened by how often the phrase “my precious circles” enters everyday conversation. Find YouTube spraying tutorial and consider hiring a professional spray person. Wonder if inhaling a toxin and the possible subsequent failure of my internal organs is a reasonable response to an aversion to dark chocolate.

8.) Choose the windiest fucking day since Hurricane Irene to spray toxic shit onto the circles. End up shellacking myself (three coats!).

9.) Wash tins. Dry tins. Be completely blown away when this takes two hours.

10.) Find Simon & Garfunkel limited engagement channel on Sirius. Finally learn Art’s harmony on “You Can Tell The World.” Sort of.

11.) Tape circles to tin lids.

12.) Stick magnets to bottom of tins.

13.) Obsessively arrange tins on magnet board. Take many mediocre photos.

14.) Buy chocolate. Feel the need to explain project to store clerk. Ignore her look.

15.) Use a random number generator to randomize the order of the chocolates. If you think I’m kidding, you don’t know me very well.

16.) Insert chocolates into tins.

17.) Eat delicious chocolate daily.

Enjoyable steps include: 10, 13, 14, 15, 16, 17, and portions of 1 and 2.

Cost Comparison

Now is the time when I smugly tell you how much money I saved by doing this myself.

–Two Neuhaus advent calendars = $60 plus tax

–Two sets of premade magnetic tins from Etsy plus a magnet board = ~$120

–“High-Maintenance Homemade Advent Calendars” = $222.57 ($139.01 without the chocolate)

Oops.

Results

So I spent a lot of time making homemade advent calendars that were more expensive than what I could have bought premade. But my calendars are super cute.   

Here are my precious circles waiting to be shellacked. Each one is stuck to the paper-lined cardboard with painters’ tape.

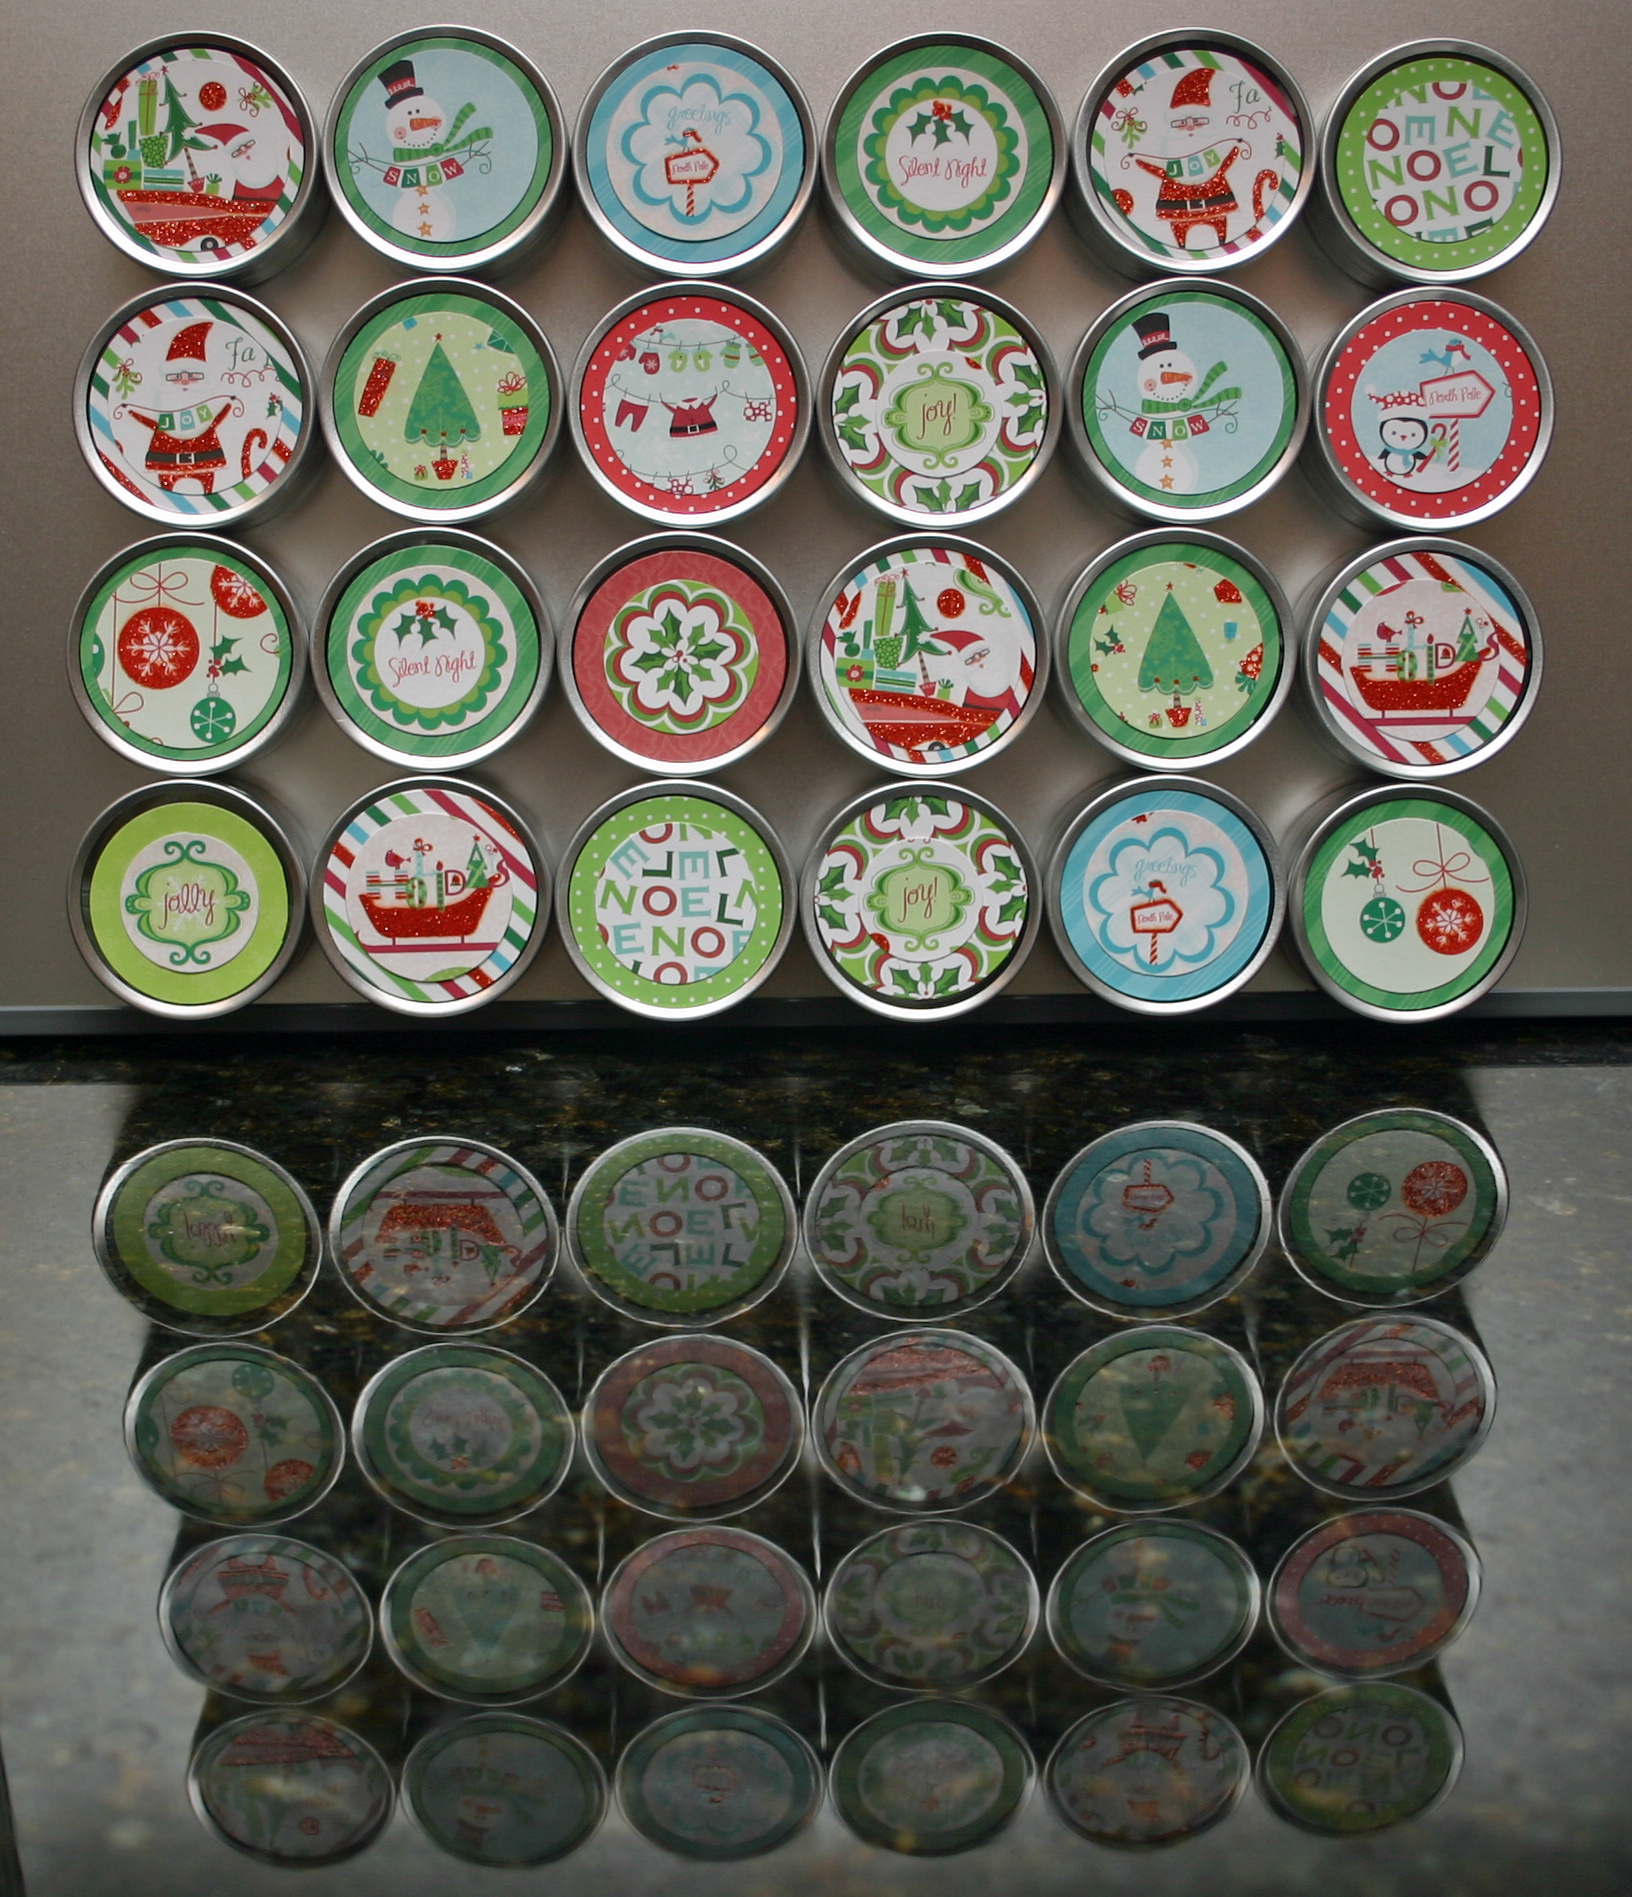
Here are my 24 finished tins on the magnet board. I couldn’t get a good picture of all 48, so use the reflection to imagine Dave’s set too.

Close up of my favorite pattern.

The chocolate on the left is called Louise and is filled with milk chocolate (of course!) ganache. I think the confetti look is pretty. The chocolate on the right is called Sapho and it’s my favorite. It’s filled with almond praline.

The funky-looking chocolate below is called 1857 and is filled with praline studded with crushed spicy speculoos cookies.

Happy Advent! I hope your holiday preparations go smoothly. Do you do anything special to mark the days before Christmas?

——————————————————–

*I toyed with the idea of naming this post “Oh my God, that’s the crafty shit,” based on the Prodigy song “Funky Shit.” Because I want to, you know, build community with other apathetic agnostic, advent-calendar making, listeners of the Prodigy on the internet. But since I had to explain the reference even to Dave, I decided there aren’t any other apathetic agnostic, advent-calendar making, listeners of the Prodigy. So much for finding my tribe.

Nov
25
2011
Photo Friday: National Family Pajama Night

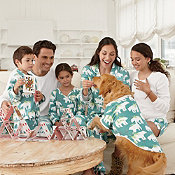
Flipping through the Company Store catalog a few weeks ago, the picture below caught my eye, along with an explanation of “National Family Pajama Night.”

The text said, “The best memories are often the ones where your child reminds you of those special moments long after the original smiles and laughter. This fall, plan a special night for your family creating new memories on National Family Pajama Night. Saturday, November 19th, 2011.”

I don’t think we are the family the Company Store had in mind.

Yeah, special moments with your child, blah, blah, blah. Whatever, look at the cute golden retriever. Wearing PJs.

National Family Pajama Night was on! We were going to make some mother fucking memories up in here.

I briefly considered ordering a matching set of family PJs, as the Company Store clearly intended. However, Dave and I couldn’t agree on a style and Dave also gingerly reminded me of the incongruity of my wish to retire early and the purchase of new, matching PJs when we already own PJs. Well, except Chuck. So we ordered doggy PJs for Chuck. Besides the joy of dressing Chuck in PJs, why was I so excited about this event?

National Family Pajama Night would give me an excuse not just to stay at home and cocoon as is my preference (logy means sluggish, after all), but to celebrate it. We weren’t just going to stay in and lie on the couch watching TV, as usual. Oh no! We were going to rock the staying in: wearing comfy PJs, renting a movie, eating popcorn and homemade two-batter brownies. Slumber party, y’all!

I “liked” National Family Pajama Night on Facebook and checked out the daily “memory-maker” ideas. I briefly considered fort building, but then decided our couch is a perfectly good fort as is. We opted out of the homemade play-doh making and playful puppet show as well.

We started off with a photo session, documenting Chuck’s angst. I should probably feel guilty about this, but I giggled the entire time. What good is having a dog if you can’t use him for entertainment?

I needed to step in and stuff Chuck into those PJs. We followed the Company Store’s sizing chart, but they obviously didn’t account for Chuck’s generous circumference. He’s pretty busty, just like his Mama. He’s a brick house, as I like to sing to him. Chuck looked like an adorable sausage for the 3 minutes we made him wear the PJs.

Our first choice of pre-movie cartoon warm-up (Charlie Brown Thanksgiving) was blocked on streaming video, but we made do with Aqua Teen Hunger Force on DVD. Then we watched Blue Valentine and ate brownies. I’d like to provide a deep, insightful review of the film, but I never really got over the first few minutes. Someone really should have warned me about the dog. Seriously, I didn’t give a shit what happened to anybody after that.

Recipe and pictures of the two batter/Twix-studded brownies coming soon.

Nov
21
2011
Cupcake Maker, Thy Name is Oven

The future of the corner bakery is at risk. The cupcake craze, in particular, has peaked. Baking at home will never be the same.

You may be curious how I know these things. Well, Sunday I saw this George Foreman cupcake grill at Wegmans and then I knew.

This is a game changer, people. Cupcake-making technology is now available to the home baker!

As you may know, I really enjoy a good cupcake. But who can be bothered to make cupcakes at home? I don’t know about you, but I don’t have that kind of time.

But now, we have a machine that easily molds batter into cupcake shape. Come on, we’ve all been there…you prepare your cupcake batter and painstakingly hand-mold it into a cupcake shape only to have the batter ooze all over your counter when you let go to form the next one. There had to be a better way!

I also never understood how the professionals got that baked consistency. No matter how long I let my cupcake batter sit, the cupcakes never had the freshly baked quality I love so much in a cupcake. Obviously the professionals knew something I didn’t.

Enter the innovative manufacturing company, Select Brands Inc.

They produce small appliances that allow us to “bring the corner bakery into our own kitchen.” Good news for us, bad news for the corner bakery.

I know what you’re thinking. “OK, so the cupcake maker solves my cupcake making needs. But what if I need to make 4 tiny pies?”

Oh yeah, baby.

Surely they can’t have figured out the pie pop?

Think again! Also, pie pop? Huh?  

While Select Brands is working hard to solve all of the most difficult challenges faced by home bakers (one self-contained, kitchen-cluttering baked-good maker at a time), they are being left behind in one area. Are you interested in making eight, and only eight, pre-cut brownies, in a machine that does nothing else? Well, Select Brands can’t help you.

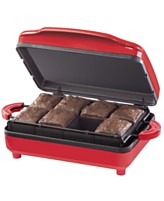
But Bella Cucina offers this problem-solving innovation…because pouring brownie batter in a 9×13 pan and then having to cut them into squares ourselves is beyond most of us.

I love the one Amazon review of this product so, so much. Kelli provides a thorough review of this little uni-tasking machine and concludes, “After trying this device, I could just as easily have turned on the oven & baked a full batch in a pan faster. Frosted them when cool & cut them.”

Whoa! What is this oven thing of which she writes?

Kelli also laments the difficulty of cleaning her brownie maker. Pshaw! As a happy customer rhapsodized in a review of the revolutionary whoopie pie maker, “Are you kidding? For the price this is fabulous.” At these prices ($29.99, but currently on sale at Amazon for $19.99!), why clean them? They’re practically disposable, just buy a new one for each batch!

——————————————-

This post was inspired by this week’s Studio 30 Plus prompt:

“And then I knew…”

I made two batter, everything but the kitchen sink brownies (I threw Twix bars in them!) over the weekend for National Family Pajama Night. Recipe, photos, and review coming soon. If only I’d had the brownie maker (then I could have wasted over half of the batter! A picture of me, Dave, and (poor tortured) Chuck in our PJs will be this week’s Photo Friday.

Jul
9
2011
Mississippi Mud Bars

Years ago, I got some sample Mr. Food ooh-so-easy Recipe Collection cards in the mail. The free cards were supposed to entice me to purchase the rest, but I simply kept the one for Rocky Road Fudge Brownies. I remember liking them a lot and they were quite easy to make since the recipe used boxed brownie mix and mini marshmallows.

I’m snobbier about my recipes these days. I recently got a great new baking cookbook called A Passion for Baking by Marcy Goldman. The Candy Bar Shortbread recipe (topped with Toblerone) was worth the price of the book by itself. But when I flipped through the book and saw the photo of Mississippi Mud Bars, I became obsessed. The picture looked sinful and I was dying to try them. They were like Mr. Food’s recipe only completely from scratch, so they had to be better, right? Plus, the description asserted “this is a definitive, perfected version.” Alrighty then!

But I never seemed to have an appropriate occasion for making them. Dave and I need to eat a whole pan of these things like we need a hole in the head. Over July 4th weekend, we were invited to an all-American themed potluck and cookout. Yee-ha! Mississippi is American!

MY NOTES ABOUT THE RECIPE (also noted below with *)

These were pretty easy to make. There is some chilling involved before you can frost them, so you need to schedule for that. I also had to buy a new pan (11- x 7-inch), a size I haven’t needed before this recipe and don’t see needing again. The pan looked so wee, but it produced plenty of bars. Goldman, for reasons I don’t fully understand, likes to blend batters and icings in a food processor. Apparently she is not aware of how annoying my food processor is to clean. I used my mixer.

The most difficult part was getting the bars out of the pan since I didn’t want to cut them in the pan. I was able to get it out onto a cutting board in one piece using a big spatula after loosening all sides with a plastic knife (didn’t want to scratch my brand new pan). If I ever make these again, I’ll line the pan with a foil sling to make removing the uncut bars easier. I made Dave cut them since getting 32 bars out of an 11 x 7 sized slab of marshmallow-spackled and frosted brownie was a messy game of Tetris I didn’t want to play.

Dave and I each tried one still cold from the fridge and they were so sweet I felt stoned. I have a very serious sweet tooth, and these things were approaching too sweet even for me. The comments I got at the potluck seemed to signal the same thing–over the top rather “ooh, it’s so good” (to steal Mr. Food’s phrase). They tasted considerably better to me once they came to room temperature. So even though they are very messy, I strongly suggest NOT serving them cold.

RECIPE

Bars

2 cups sugar

3/4 cup unsalted butter, cut into chunks

4 large eggs

2 teaspoons pure vanilla extract

1 1/2 cups all-purpose flour

1/3 cup cocoa powder, measured and then sifted (*I refused to sift a third of a cup of cocoa, I mean…seriously)

3/4 teaspoon baking powder

pinch baking soda

1/8 teaspoon salt

1/2 cup chopped walnuts, optional (*I used and would strongly recommend otherwise there will be nothing blocking the sugar rush from killing you)

1/2 cup semisweet chocolate chips (*I used my new standby, Hershey’s semisweet)

1 1/2 cups shredded coconut, optional (*didn’t use)

1 (7 oz) jar marshmallow creme

Icing

3 cups powdered sugar (*I ended up blending in close to 3/4 cups more because it just didn’t seem to be getting sufficiently stiff (heh-heh))

1/2 cup unsalted butter, softened

1 teaspoon pure vanilla extract

1/2 cup cocoa powder, measured and then sifted (*sift if you want, see if I care)

1/2 cup evaporated milk

Steps

Preheat oven to 350. Generously spray an 11- x 7-inch pan with non-stick cooking spray and place it on a parchment-paper lined baking sheet (*the author has her reasons for this which I don’t think are necessary, but I did it anyway because I worried the batter might spill over–it didn’t).

Blend sugar and butter until pasty. Add eggs and vanilla; blend well. Fold in flour, cocoa, baking powder, baking soda, and salt and blend well. Fold in nuts, chocolate chips, and coconut (*ick!) and blend briefly. Spoon into prepared pan.

Bake until set and firm to the touch, 25-30 minutes (*I baked close to 30 minutes and wish I’d done a little less). Spread marshmallow creme on hot cake and refrigerate, uncovered, 3 or more hours.

For icing, blend all ingredients until stiff and glossy. Using a metal spatula, spread icing on chilled uncut bars. Chill to set icing. Cut into bars (*good luck with that!).

May
10
2011
The Joys Of Home Ownership

If my responsibilities would just fuck off for a minute, that would be great. I don’t need any more lemonade making tasks added to my schedule. I’m busy.

I would soak in a tub of Calgon if I thought it would take me away. But I probably shouldn’t introduce any additional liquid into this house. With my luck, the tub would fall through the kitchen ceiling.

When we moved in 2006, we purposely bought a home that had been completely renovated. We seem to have a “please screw us” sign on our backs, so we wanted to minimize having to deal with contractors.

Everyone was so impressed with the house we bought. Our realtor was salivating over it. The home inspector rhapsodized about how well it was built. The two other bidders who drove up the damn price loved it too.

When water seeped in through the foundation and ruined part of our entertainment center in the finished portion of the basement, I took it in stride. We didn’t even have to pay to fix that. Dave diagnosed and fixed the problem himself. Go Dave.

When we learned that the A/C unit in the attic didn’t have an appropriate emergency back up pipe to avoid leaks, I was pissed but basically took it in stride. We fixed it before it was ever a problem.

When water started dripping through the ceiling in the master bedroom, I took it in stride. OK, that’s a lie. The dripping woke me up and forced me to sleep on the futon in the guest room and that really made me cranky. But a thousand dollars later, the roof seems fixed and there’s only the tiniest spot of water damage on the ceiling that will inevitably stay there until we want to sell.

When Dave said there was water in the basement over Easter weekend and he didn’t know why, I lost my shit.

Call me picky, but I prefer NOT to have water in places not meant to house water.

Memories of our previous place, a townhouse built of sugar cubes, filled my mind with dread. Every day that fucker sprung a new leak. Fixing those leaks so that we could sell the house was one of the most frustrating experiences of my life. Not a single one of the endless parade of contractors that came out had any fucking idea what was causing the water to pour through our kitchen ceiling every time there was a hard rain. We had the roof over the window re-caulked multiple times. We had the seal on the second floor windows checked, we had the brick and flashing inspected. We considered giving up and trying to promote the leak to potential buyers as a “water feature”.

Our realtor said no. So it came to a physicist and a social science researcher having to diagnose the problem. We are available for consultation, call now.

Dave cut a big hole in the kitchen ceiling, so we could shove our heads up there and see what was going on and also so the mold spores could escape their confinement. It wasn’t raining at the time and even if it were, I don’t know what the hell we thought we’d see up there that would help (unfortunately there was no shoelace untied or snowman with his hat blown off…check out 23:35 to 26:50 of the video below).

http://www.youtube.com/watch?v=e_rUNQiIXqA

Once we cut the hole, it completely stopped raining for days and days. Our new pastime became watering the house with a hose while standing on a ladder. Yes, this looked just as odd as you might think.

Things we learned:

* Brick is porous!

* I’m allergic to mold!

* Contractors suck!

* We should move!

So we bought this newly renovated house. The current leak here came from a burst pipe going to the fridge. Ironically, this is the same pipe that has been failing to provide water for the ice cube maker and filtered water dispenser for over a year (the plumber said it was the fridge; the appliance repair man said it was the plumbing, we said fuck it and bought a Brita pitcher).

Score one for the plumber because even though water wasn’t getting to the fridge, it sure as hell got everywhere else it wasn’t supposed to go when the pipe burst, as evidenced by the water in the basement, the mold growing behind the fridge and the damage to the wood floor and the pantry cabinet.

It is not exactly clear what to do. Our high bid is definitely a Cadillac–$2500 just for mold remediation, not including reconstruction afterward. We’d likely be without the use of our kitchen for a while as the area would be blocked off during the work. This firm also suggests we hire a separate firm to create the plan and inspect the work, to the tune of an additional $1000. The low bid came last week in the form of a guy who essentially told Dave he should put some Windex on it. Voila, problem solved.

But at least we have ants!

Apr
28
2011
Rebirth And Chocolate

I have a bit of a nostalgia problem. Also, once I experience something a certain way and like it, it’s “tradition.”

Growing up Catholic, Easter was, to use religious parlance, “a big fucking deal.” I still celebrate Easter with an enthusiasm completely out of proportion with my belief in its purpose…well, I celebrate the parts that are pagan in origin anyway.

Winters in Erie always kicked my ass. Skies were grey, air was frigid, days were short, snow was deep. Through the winter holidays, this weather could be charming. Like the time more than 20 years ago when my Mom and I drove home after seeing a play during the first snow of the season. The way the snow glittered in the lights as it fell took my breath away. Dreaming of a white Christmas and all that. Unfortunately, while I had no further need for winter after Christmas, it would hang around for several more months each year.

Living in this barren winter landscape, the other rebirth, Spring, was the most attractive part of Easter. Well, rebirth and chocolate I suppose.

In recent years, I have actually looked forward to Easter more than Christmas. And that’s saying something.

Why do I love Easter?

*Spring where I now live is lovely unlike the cold, yet snowless Christmases we get here (rebirth, blah, blah, blah).

*It’s an excuse to eat chocolate.

*I get to take vacation time without the hassle of going somewhere. At Christmas, we lose two days to travelling and have to pack the car with us, gifts, our crap, and a dog as if we were playing Tetris. At Easter, my Mom comes to us.

*Instead of making a bunch of different kinds of cookies and the dreaded buckeyes, all I make for Easter is this white chocolate raspberry cheesecake.

This is one of the few things that tastes mindblowingly good to me even though I had to make it. There is only one piece left right now and Dave’s entitled to it, and I’m near tears.

*Decorating for Easter takes about 5 minutes and involves this fabulous fiber optic light up Easter bunny. I don’t know about you, but this screams “Christ is risen” to me.

*None of that annoying gift giving crap. The only thing I have to shop for is chocolate. Here is a picture of this year’s Neuhaus Easter eggs.

*Easter is one of our Wegmans occasions and I love going there.

Thoughts on Easter 2011

The Peeps diorama contest (for some reason I feel the need to point out this is brought to you by the newspaper that broke Watergate) always helps me get into the holiday mood, and this year was no exception. My favorites never make the finals, I guess I’m not a good judge of art. My favorite is this take on Magritte.

Of course, how could I resist this Moses-themed diorama?

Mom came down on Wednesday and her job is to supply us with Romolo’s chocolate. Here’s what she brought this year. As you can see, we had to make due.

I have to give a shout out to the only grocery store Easter candy in our repertoire, Cadbury mini eggs. Maintaining my weight during Lent and Easter would be a lot easier if I didn’t know these things existed. I never knew about these until Dave’s Mom included a bag in an Easter care package she sent him the first year we were dating. We sat in the common room in my dorm and ate the whole bag in one sitting. I smell a tradition!

Seriously, about the smell? Ever notice how overpoweringly good the unopened bags smell? It’s intoxicating. I cannot buy these or open a bag without taking a deep breath and moaning with pleasure first.

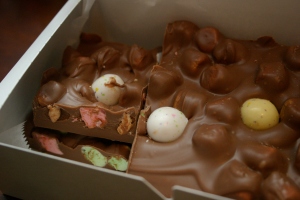
In other chocolate news, I was super excited about this Easter bark from Romolo’s, milk chocolate studded with colored mini marshmallows and malted eggs, but the reality didn’t live up to my expectation. The marshmallows got stale.

I broke down and bought The Ten Commandments on Blu-ray. The gift set is awesome. The box splits open in the middle, parting like the Red Sea to reveal the discs stored in a replica of the Ten Commandment tablets and several extras.

Unfortunately, we only made it to intermission. We got a late start watching the movie, and it was almost midnight by the time we finished the first disc. We gave up, so the slaves didn’t get freed this year. Oops. I blame Lifetime. We simply were unable to turn away from the horror of the movie about Prince William and Kate Middleton.

I had to work on Easter Monday, which is NOT tradition. I like to have all of the named days off (OK, I don’t usually take off Maundy Thursday, even though I love saying Maundy). So we decided to have Easter dinner on Saturday and then go out to a fancy brunch on Easter. There was a buffet of appetizers and dessert, plus a choice of entree and side. The food was fabulous. That plus the ridiculous cost of the brunch encouraged me to eat myself sick (unfortunately, literally).

The weather was nice enough over the weekend to sit on the front porch, which I hardly ever have time to do even though it is one of my favorite things. I sat in my rocking chair, ate chocolate, sometimes read my mindless book, other times just watched over my neighborhood like the old lady I am while listening to Dave play the bean song on his guitar (it’s a real song that he plays over and over. Since I’m not familiar with it, I made up my own lyrics about beans).

Mom and I went shopping on Thursday (Maundy!) and I was pleased to find that I’ve gone down a size. This is almost certainly due to the discipline I had over Lent in reducing grains and sugar. We have a ton of chocolate left. I’m going to eat it. Uh-oh.

What are your Easter traditions? Do you have any chocolate left?

Feb
6
2011
Perfect Chocolate Chip Cookies?

I’ve never been fully satisfied with any chocolate chip cookie recipe I’ve ever tried. My search for a perfect homemade chocolate chip cookie has been going on for years. My mother-in-law made excellent chocolate chip cookies. I remember fondly the care packages she sent to Dave filled with these thick, chewy, beautiful cookies, both because I never received care packages myself (I was so deprived!) and because her cookies were so good. I wonder if she knew that the reason I had tried them is because I stayed in Dave’s room a lot of the time (scandalous!)? When I asked her for the recipe, she said she used the Nestle Toll House recipe on the back of bags of Nestle morsels. However, when I tried that recipe, it did not yield her cookies. I tried probing to see if she did anything special that she wasn’t spilling and she insisted she just followed the recipe.

Since then I’ve done some research and have tried various other recipes. While I’m not going to say that the cookies I made were bad (most chocolate chip cookies are pretty tasty, but we’re talking about finding “the one” here), the recipes I tried weren’t yielding what I wanted, a rich and chewy cookie. It’s also important to me that the cookies have some heft to them, that they don’t spread out and get too thin.

One recipe that seemed very promising was Alton Brown’s “The Chewy.” While the chewy was good, it wasn’t my perfect cookie. While people seem to agree that melted butter is a key to chewy cookies, these cookies came out very greasy to the touch. They were also flatter than I wanted.

The next really promising recipe came from David Leite’s 2008 NY Times article. I was very excited about this recipe. Leite was essentially doing the same thing I was doing, searching for the perfect chocolate chip cookie, but he had access to all kinds of resources (well-known and accomplished bakers) I didn’t have. The fact that he published a recipe must have meant he’d found the perfect cookie, right? Well, they weren’t the perfect cookies for me. These cookies were good right out of the oven, but were nothing special at all once they had cooled. By the next day, they were dry and lacking in flavor. They actually weren’t even worth the calories (looking back on the recipe in my disappointment, I realized that Leite himself had essentially said as much in the recipe–“eat warm”). The cookies were better if you reheated them a bit, but I didn’t feel that they were worth making again. I hadn’t found the perfect chocolate chip cookie.

It has been a couple of years since I tried making chocolate chip cookies. Then two weekends ago we saw an America’s Test Kitchen episode with the rather pompously named “Perfect Chocolate Chip Cookies.” A lot of what I had already learned matched their recipe, with a few new twists. It seemed worth a try. Four things caused me some concern:

1.  the melted butter would yield greasy cookies (a la the chewy),

2.  browning the butter would be a pain and would make the cookies taste burnt (on the show they were so busy discussing the depth of flavor browned butter adds that I think they weren’t paying enough attention because all I was seeing was burnt butter…I actually think they made a mistake on the show, because the picture on their website doesn’t show butter that dark)

3. the recommended chocolate chip wouldn’t appeal to my tastes

4.  the enormous size/ridiculously low yield

I don’t care how big a cookie is, a yield of 16 cookies isn’t worth my time. Also, their insistence on having to make monstrously-sized cookies in order to obtain that elusive chewiness seemed like a cop-out to me. It implied to me that they had not actually perfected a technique that yields chewy cookies. If they had a perfect chewy cookie technique, why couldn’t you use that technique to make normal sized cookies that would be chewy?

Last weekend, I made these cookies. I solved concerns 3 and 4 by doubling the recipe. Doubling the recipe meant I’d get a non-laughable yield and it meant I could use their recommended chocolate chips in half of the dough and good old Nestle Toll House morsels in the other half (Just like the Test Kitchen, I’m a little bit of a chocolate snob too, but I started wondering if the missing link in duplicating my mother-in-law’s cookies was actually the chip. I usually use fancier chocolate chips and I’m sure she just used Nestle-so that seemed worth a try). So there would be a chocolate chip competition thrown in too.

The first step was the dreaded browning of the butter. I was very worried that their instructions would yield burnt, unusable butter but as it turned out I had trouble getting any color on the butter whatsoever. Even though Dave is a fabulous chef, we don’t actually have the pan they suggest for this task (10 inch skillet that is not dark or nonstick), so I ended up having to use a saucepan. The saucepan provided less surface area for cooking. That, plus having double the amount of butter (since I was doubling the recipe), seemed to stop the butter from browning. After going a couple of minutes over their maximum suggested time for the browning, I freaked out and just stopped because I had this vague recollection from watching the show that they had said  the reason they stir a few more tablespoons of solid butter into the stuff that has been melted is due to evaporation during the melting. I worried that I wasn’t going to have the right amount of butter if I kept it on the heat any longer. So check out this flavorful browned butter…

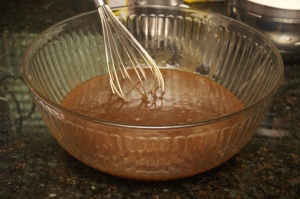
Other than that, everything went fine. I thought the added steps of waiting for the sugar to dissolve might be annoying, but it didn’t take long and seemed necessary (the batter certainly didn’t look ready for the dry ingredients after the first whisk). The next two pictures are of the result of the first whisk of butter and sugar and then what the mixture looked like right before adding the dry ingredients.
I almost forgot to split the finished dough in half to mix different chocolate chips in, but remembered just in time. We had the right size scoop (3 tablespoon) so portioning the dough was super easy. I ended up making the appropriate number of what I started calling “Dave’s cookies,” but only got 15 of “my cookies.” Dave’s cookies had the dark Ghirardelli chips mixed in and mine had the Nestle morsels. The next two pictures are a batch of my cookies waiting to go into the oven and a cute singleton of Dave’s dough. I started calling the cookies “mine” versus “Dave’s” because I know Dave likes dark chocolate and I generally don’t and I confirmed that through sampling some chips during the whisking and waiting steps. I really wasn’t wild about the dark chips, while the Nestle just tasted like normal chocolate chips to me.
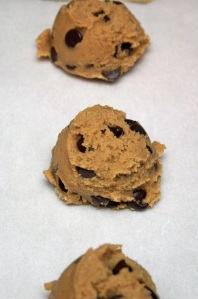
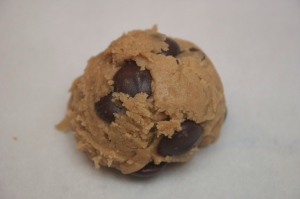
I baked each sheet of cookies for about 11 minutes, which seemed perfect. I also got them the hell off the cookie sheets to cool immediately because I didn’t want them to continue baking. Here is a batch baking in the oven and what they looked like after I moved them to the cooking racks.


So what was the verdict?

I ate one of my cookies when they were still pretty warm. It tasted good, but was pretty greasy (like the chewy). A few hours later I had another and it was just lovely. The butter must have solidified or reabsorbed or something because they weren’t greasy any longer. I was saying to Dave that they reminded me of something when it hit me–his Mom’s cookies! Strange, because I know she didn’t melt her butter or use dark brown sugar or any of these other recipe changes. But they are the closest thing I’ve found to her cookies. Maybe the size mattered; my memory of her cookies is that they were pretty large. I froze most of the cookies the first night. We ate some of what I hadn’t frozen the next night and they were still very good at room temperature. The next night they were starting to get a little dry but were still good. Since then, we have reheated a couple from frozen and they are about as good as freshly baked that way (it is key to use a low power level on the microwave otherwise the cookie regains that fresh out of the oven greasy quality, you want the cookie thawed and maybe a little warm, but not hot).

What about the chip test?

Dave strongly preferred the Ghirardelli dark chips. While I liked the dark chips better in the finished product than when I tried them raw, I strongly preferred the Nestle. I’m sure there are better chips than Nestle, but I just don’t care for dark chocolate. I prefer semi-sweet or even milk chocolate. After deciding for myself, I checked the Test Kitchen’s website and read their chocolate chip reviews. I could tell just from the first line of their review of the “highly recommended” Ghirardelli that they are not for me:  “Distinct “wine,” “fruit,” and “smoke” flavors made this “adult chocolate” a clear winner.” The Test Kitchen tasters hated the Nestle chips and rated them as “not recommended.” They noted the high sugar content and said they were “unpleasantly sweet.” I guess this is just further confirmation that I have the palate of a 5-year old, because a.) I’m not sure I’ve ever tasted anything “unpleasantly” sweet; sweet is an inherently pleasant flavor to me and b.) if having an “adult” palate means I have to want my chocolate to taste like wine, fruit, and smoke (I mean, smoke…really?), I’ll just stick to being childlike.

But in reading their reviews of other chips, I think the Hershey’s semi-sweet might be a good option for me to try next time. While the description doesn’t make it sound like the tasters liked them, they did rate them as “recommended.” Their biggest concerns were that they were “too sweet” and had “a distinct “milky” flavor…more similar to milk chocolate than semisweet chocolate.” But the tasters thought they had “good cocoa flavor in cookies.” Those chips totally sound like a good fit for me.

Summary: I wanted to shove my face in the dough the whole time I was making these cookies. Writing this post and looking at these pictures again makes me want to go get another cookie out of the freezer. Not sure that they are “perfect,” but they are the closest I’ve found so far. I will totally make these cookies again. Next time, I think I’ll use Hershey’s chips in my batch and that I will brown the butter for the two batches separately to try to get the browning the recipe calls for.

“Perfect Chocolate Chip Cookies” From Cook’s Illustrated.

Makes 16 cookies.

Avoid using a nonstick skillet to brown the butter; the dark color of the nonstick coating makes it difficult to gauge when the butter is browned. Use fresh, moist brown sugar instead of hardened brown sugar, which will make the cookies dry. This recipe works with light brown sugar, but the cookies will be less full-flavored.

Ingredients
1 3/4  cups unbleached all-purpose flour (8 3/4 ounces)
1/2     teaspoon baking soda
14       tablespoons unsalted butter (1 3/4 sticks)
1/2     cup granulated sugar (3 1/2 ounces)
3/4    cups packed dark brown sugar (5 1/4 ounces) (see note)
1         teaspoon table salt
2        teaspoons vanilla extract
1        large egg
1        large egg yolk
1 1/4  cups semisweet chocolate chips or chunks (they recommend Ghirardelli 60% Cacao Bittersweet Chocolate Chips)
3/4     cup chopped pecans or walnuts, toasted (optional)

Instructions

1. Adjust oven rack to middle position and heat oven to 375 degrees. Line 2 large (18- by 12-inch) baking sheets with parchment paper. Whisk flour and baking soda together in medium bowl; set aside.

2. Heat 10 tablespoons butter in 10-inch skillet over medium-high heat until melted, about 2 minutes. Continue cooking, swirling pan constantly until butter is dark golden brown and has nutty aroma, 1 to 3 minutes. Remove skillet from heat and, using heatproof spatula, transfer browned butter to large heatproof bowl. Stir remaining 4 tablespoons butter into hot butter until completely melted.

3. Add both sugars, salt, and vanilla to bowl with butter and whisk until fully incorporated. Add egg and yolk and whisk until mixture is smooth with no sugar lumps remaining, about 30 seconds. Let mixture stand 3 minutes, then whisk for 30 seconds. Repeat process of resting and whisking 2 more times until mixture is thick, smooth, and shiny. Using rubber spatula or wooden spoon, stir in flour mixture until just combined, about 1 minute. Stir in chocolate chips and nuts (if using), giving dough final stir to ensure no flour pockets remain.

4. Divide dough into 16 portions, each about 3 tablespoons (or use #24 cookie scoop). Arrange 2 inches apart on prepared baking sheets, 8 dough balls per sheet. (Smaller baking sheets can be used, but will require 3 batches.)

5. Bake cookies 1 tray at a time until cookies are golden brown and still puffy, and edges have begun to set but centers are still soft, 10 to 14 minutes, rotating baking sheet halfway through baking. Transfer baking sheet to wire rack; cool cookies completely before serving.

LOGY EXPRESS NOTE: I slid the cookies, parchment and all, off the cookie sheets onto cooling racks immediately on taking them out of the oven, because I didn’t want them to keep baking and because I only have two appropriately sized cookie sheets and needed to reuse each for the second batch of dough. After a few minutes, they were set enough to GENTLY slide them off of the parchment if you want to reuse your parchment.

Dec
28
2010
Christmas Wrap-Up

Well, Christmas is pretty much a wrap (HA!). Here are some remaining odds and ends about the holiday.

Since our first Christmas at our current house, I look forward to one card above all others. Unfortunately it’s not addressed to us, but whatever. Each year, this lovely family of strangers takes a photo for their Christmas card that includes their absolutely adorable Bernese Mountain Dog, which is my favorite breed. I was thinking about scanning the card and photoshopping out the people so you could see how adorable this dog is, but it seems too risky. I don’t want these people to figure out that their friends (well, whatever you call people who are close enough to be on your Christmas card list but not close enough for you to realize they’ve moved even after five years) don’t live at our address anymore, because I love seeing their dog every year!

I made five kinds of cookies this year (plus the buckeyes). Each year I try to make something new and each year I try (and fail) to make soft and chewy gingersnaps (I realize that I shouldn’t insist on calling them snaps if I want them chewy, but that’s my way).

This year, I ended up making three of the five from Carole Walter’s Great Cookies. This year’s new cookie was chocolate chocolate chip. I thought my nephew in college would like them, so I made a double batch and sent half to him for his finals, and froze our half so they’d last until Christmas. They were OK, but they were more of a pain than drop cookies should be and they were not as good as my usual chocolate Christmas cookie (chocolate cracked cookies from a small paperback Crisco cookie cookbook I’ve had since high school). Carole Walter says to chill the dough for an hour, but before I could even transfer the dough into a smaller bowl for the fridge, it had stiffened up like a…well, never mind. Scooping the dough out to drop the cookies onto the sheets turned out to be more like hacking at it with a pick axe. Thumbs down on these…never again.

Her pecan tassie recipe is excellent though. This is the second year I made these, and I love them. And I think I finally have a gingersnap winner. Her molasses spice cookie stayed soft and chewy (although I replaced all of the white sugar she called for with brown, not sure what they would’ve been like as specified in the recipe). My sister-in-law loved them and asked for the recipe so I guess that one’s a keeper too.

One other thing I’ll say about the Carole Walter cookbook is that she’s either smoking crack or my oven runs cold. She insists that her recipes are tested for lighter bakeware and that if you use darker, non-stick bakeware you need to reduce oven temperature and baking times. However, I found that her temperatures and times were about what were necessary for the batches I baked on my darker non-stick and not nearly enough for my lighter bakeware. I had to leave all of my cookies in for several more minutes on my light bakeware and the tassies I did in my lighter mini muffin tins never browned, even after an additional 10 minutes. 

Rounding out this year’s cookie selections are two rolled and cut out cookies. I’ve been making raspberry linzer rounds (also from the Crisco book, although I always use butter) for at least 18 years, maybe longer. I took a break from making them for a couple of years, because the dough is kind of hard to work with, and the fact that they are sandwiched together means the yield from your hard work gets cut in half. But the raspberry jam thumbprints I made instead just weren’t as good. Having a marble table top to roll out the ridiculously soft and sticky (even after chilling overnight) dough and getting specialized linzer cookie cutters has made these cookies a lot easier. Much better than the year my tiny apartment kitchen got all hot from baking and the cut cookies kept completely losing their shape between the counter and the cookie sheet and I threw the cookie cutter at Dave in a huff and told him to make them (yes, somehow it was his fault). I am nothing if not mature.

The last cookie was my second, and maybe final, attempt at my sister-in-law’s (of buckeye recipe and molasses spice cookie-liking fame) almond butter cutouts. I usually don’t like iced or frosted cutouts, but hers were so good I asked for the recipe a few years ago. Her frosting was so sweet and fluffy, almost like buttercream, but following her recipe the following year yielded a thin icing rather than a spreadable frosting. I think she’s been making them so long she doesn’t use a recipe anymore, like my Gram, who could never tell you how she made something, she just knew how to do it (and now no one else does!). This year, I did some frosting research and ended up with something a lot closer to what I wanted. But my cookies still weren’t as good as what I remembered. I was hoping to do a side-by-side tasting at the in-laws’ get together, but hers were gone by the time we arrived. I think I give up. If I cull any cookies from my list next year, I think these will get the axe. Next year I’ll just have to make sure I get some at the in-laws’. 

I had planned on taking pictures of the cookie-baking as it happened, but I was lucky to get the baking done at all this year. I took these pictures once we got to my Mom’s. Her kitchen lighting is rough and I had a hard time trying to find a decent wall to bounce my flash off of and an even harder time not getting my own shadow into the picture. I ended up standing on a chair to get some of the photos and I could’ve fallen and cracked my head open, so there’s blog commitment for you. 

Dec
2
2010
A Great Big Bundle of Joy

Holy shit, it’s December.

This turn of events is horrifying–where did 2010 go exactly? On the other hand, yesterday I got to open door number one on my Neuhaus advent calendar. Beyond all reason is a good way to describe the way I love Neuhaus chocolate. Look at how adorable this year’s advent calendar is…

So this means it’s Christmas time, and there’s no need to be afraid.  But I am a little afraid of my to do list.

Christmas was magical for me as a child. What’s not to love about Christmas as a kid, with the special events, vacation from school, the cookies, and the much-anticipated presents. Some of my childhood home life was, shall we say, unsatisfying, but at Christmas things seemed different. Christmas somehow lightened my father’s mood and the tension in the house that often permeated our day-to-day existence dissipated during the holidays. The front two rooms of our house were transformed by the tree and the beautiful soft glow of Christmas lights and our ridiculous, but awesome life-size light-up Santa. I can still feel the warmth and coziness of our house at Christmas and remember fondly all the traditions we religiously upheld (cutouts frosted in pink, orange-flavored drop cookies frosted in green, driving around the neighborhood to see light displays–the house with lights that blinked in different colors blew my mind, and even where we all sat to open gifts on Christmas morning). Christmas was like cuddling under a favorite blanket.

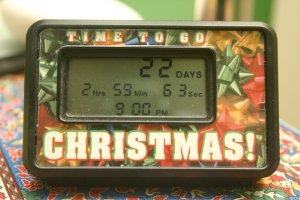
I started counting down the days more than a month out and created elaborate color-coded countdown calendars (now I have an electronic countdown timer because I am more mature and sophisticated).

I’m not sure when I turned this corner exactly, but lately I’ve started to see Christmas more as something to get through than something to look forward to and that depresses the crap out of me. Now if I want cookies, guess who’s baking them? Right, that would be me. (Shout out to my Mom for still making the traditional green-frosted orange cookies I loved as a child). Even if I don’t want something, I just might be making it.  Also, as a child, your Mom wraps up shaving soap for your Dad for you and your gift-giving is complete. As an adult, you are expected to put more effort into the giving. When I have a great gift idea for a loved one, usually my Mom or Dave, I get pretty jazzed about the giving. When I don’t have great ideas, or even OK ideas, which seems to happen more and more frequently, I feel gift-giving performance anxiety.

A couple of years ago, I found myself lingering in a surprisingly wistful way on a catalog page depicting a mother and daughter in matching flannel nightgowns sitting by their Christmas tree. Panic-stricken, I thought “am I changing my mind about having children?!?” I started to imagine myself in this catalog scenario and realized that I didn’t see myself as the mother in that picture. Imagining myself as the mother did not replicate the warm and fuzzy feeling. No, I was wistful about being the kid.

As I was writing this post, one that was originally intended to be about my Christmas to do list and trying to rekindle the joy, a possible explanation hit me for the dampening of my enthusiasm (I mean, in addition to having to create the magic myself now rather than my parents being responsible). Christmas used to be more interactive, a shared experience among family and friends. My immediate family was never large,  but through the early years of high school, my Gram was around to celebrate with and now she’s gone. In high school, my music class practiced Christmas songs for weeks and it was so engaging and special. We sang this absolutely hideous yet wonderful song called “Jazzy Jinglin’ Bells” (go ‘head, baby) which I will never forget even though it’s been 23 years (gulp). Our foreign language teachers taught us “Silent Night” and we sang the song in English, French, and Spanish at the Christmas assembly.

Making many different kinds of cookies has felt like such drudgery during recent Christmases. I was in high school when I first started this tradition. My friends used to come over and keep me company while I baked. In fact, there’s a cookie I can’t make without them. Napoleon Hats are almond-flavored cutouts filled with a ball made of almond paste and shaped to look like a tri-cornered hat. I’m too spatially challenged to shape these cookies myself. I get the dough made, rolled out, cut into circles, the almond paste balls placed in the middle and then… Yeah, try as I might to make three equally sized folds on a circular-piece of dough, I cannot do it so that it stays or looks like a Napoleon Hat. Miss you Erin and Sarah and Kristen, come help me make cookies!

In college, the University Choir hosted an annual “Boar’s Head” dinner. As a member of the choir, I helped serve the dinner to my fellow students and prior to each course we sang a festive holiday song. Wassail! In college and the years immediately after, visiting home at Christmas was a chance to catch up with everyone. In more recent years, I’ve lost touch with some friends and others have since moved away from my hometown.

One of my favorite Christmas-related memories is from a visit to Dave’s hometown when we were still dating. I can still make myself crack up thinking about the time we went shopping with Dave’s friend Jim on this visit. Dave and I were looking to spice up our Christmas music collection and Jim offered to buy him a CD for Christmas. Dave selected Acid X-mas. We popped the CD into the car’s player and cranked it up for the drive home. I will NEVER forget the look on Jim’s face as the first strains of “Carol of the Bells (A Demonic Christmas)” washed over us. We laughed so hard I thought I’d be sick. I can’t even remember how long it’s been since we’ve seen Jim.

So adulthood might take some of the shine off Christmas for more than one reason. At this point, I no longer want to provide a boring list of my Christmas to dos. Suffice it to say that it’s long, and that in my new time management spirit, I have created a spreadsheet (I know!) to ensure that completing it all is actually a do-able feat. I’ll probably share the fruits of some of the tasks here, but as for the list, who gives a shit. I’ve thought about cutting back, but I realize there’s a reason I do all this stuff. The tree is pretty. The gifts give people pleasure or at least let people know you care about them. The photo calendars let me use the photographs I’ve taken over the year in a creative way rather than just staying trapped on my computer. People enjoy the cookies and the buckeyes I make. And I’m GLAD that people enjoy the fruits of my labor.

Happy Advent!

Nov
21
2010
How to Make Buckeyes

The 2010 buckeye making is complete. It didn’t seem quite as bad as usual. Making the dough the night before was a good idea. That took about an hour on Friday (it took longer because I was taking pictures and had to set up the camera, etc…). Then I spent between 5 and 6 hours on the buckeyes on Saturday. It’s a commitment.

Here are the ingredients. Healthy-looking, no?

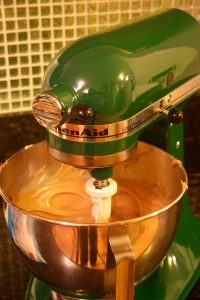
The first step is to mix the softened butter and peanut butter together. Not that this picture is critical, but because I love my green mixer, here is what the peanut butter and butter look like after they are mixed together.

Adding the powdered sugar is where this gets interesting. Every year I try to use the mixer to get as much of the 3 pounds of sugar into the dough as possible and every year I have to give up and use my hands to knead the last pound or so. I hate having to knead the dough by hand so I like to take the mixer part right to the brink of buckeye dough explosion. The dough in the next picture is trying to make a break for it. Thankfully, this year I made considerably less mess and inhaled considerably less powdered sugar than usual. Dave thinks I might be able to get all the sugar mixed in if I had the larger 6-quart Kitchen Aid, but they don’t make it in green, so that’s not an option.

Here is what the dough looks like with all the powdered sugar almost fully incorporated. I chilled the dough overnight since I planned to roll the buckeyes the next day. After I took the dough out of the fridge, it took about an hour for the dough to warm up enough to roll.

The recipe I use says that the rolling “takes forever, so turn on a good movie and begin to roll balls.” The first few years I made buckeyes, I fought the movie-watching suggestion. I was worried about spilling dough in the living room and didn’t want the process to take any longer than it had to. But you end up standing for hours to dip the buckeyes, so it’s silly to stand for rolling when you can sit and be entertained by something else. The first year I took the movie suggestion, I chose “The Lion, the Witch, and the Wardrobe.” That wasn’t a good selection. Some crying took place during that movie, which interfered with the rolling. This year I watched “Marie Antoinette,” which save for a scene in which they take away her dog, was a tear-free choice.

The recipe also says to “try not to eat too many during the movie.” I have never been even remotely tempted to stick a piece of buckeye dough sans chocolate coating into my mouth. But if that turns you on, go for it, who am I to judge? The rolling took me about 2 hours and 45 minutes this year, but I was distracted by the movie. I think I’ve been able to do this in 2 hours before.

My favorite part of the recipe is the uselessness of the instruction on size. The recipe calls for the dough to be rolled into balls that are “buckeye size.” I use a small ice cream scoop (size 70) to portion out the dough. The recipe says it yields about 100-120 buckeyes, but I have always gotten about 12 dozen. My feeling is that if you are going to go through all this work, you might as well try to get as many buckeyes as possible. This year I made 138 buckeyes and I think they are plenty big. Here they are—chilling before their chocolate dip.

The recipe calls for melting chocolate chips with some paraffin. The first year I made them, I followed this suggestion and they tasted fine. But because mixing wax into my food freaked me out and also because I like to make things more difficult, the next few years we tempered chocolate for the dipping. I say “we” because I needed Dave’s help to do this. So then we were both cranky. Then we moved on to trying to melt chocolate chips without breaking their temper. Don’t do this, you will want to kill yourself. To avoid breaking the temper, you have to keep the chocolate at a temperature which won’t allow the chocolate to get thin enough to dip the balls easily. And it takes forever to melt chocolate chips this way (if you try to do it faster the temperature will get too high and then the chocolate won’t set up after dipping the balls). Now I use milk chocolate melting caps from Romolo’s. Romolo’s is a handmade chocolate shop in my hometown that I visit pretty much daily every time I’m in Erie. The caps melt easily and the buckeyes are just as good dipped in this chocolate. In fact, several people actually noticed the difference and said the buckeyes were better this way. So yea, Romolo’s!

Once the chocolate is melted, you can dip the chilled balls. I use a wooden skewer for the dipping and a second skewer to ease the dipped buckeyes onto wax paper. The second skewer becomes less necessary the more the balls soften. When the balls get too soft, they’ll dive right back into the chocolate before you can get them to the wax paper, which is not at all annoying. The dipping took me 2.5 hours this year. Here is a ball getting its buckeye chocolate dip.

I tested one the night I made them and it was perfectly fine. But the magic of eating them is gone for me. All I taste is my effort, if that makes any sense. Here is a shot of the buckeyes resting before I packed them for freezing.

Here is the recipe.

BUCKEYES

1 lb. butter, room temperature

2 lbs. peanut butter, creamy

3 lbs. powdered sugar

******

2 bags chocolate chips (NOTE: I used slightly less than 3 bags—1 lb. each—of Romolo’s milk chocolate melting caps)

2-3 oz. paraffin (NOTE: I don’t use this)

******

1.) Cream peanut butter and butter together. Gradually add powdered sugar and mix well. By the end you may need to use your fingers and knead it to get it all mixed.

2.) Roll mixture into balls* – buckeye size. Makes between 100-120 balls. Refrigerate balls for at least an hour. They dip better when chilled.

EDITED 12/4 to ADD: Just saw that someone found this post by searching on “buckeye recipe keep in freezer until ready to dip in chocolate.” Maybe it won’t matter if you use paraffin, but I strongly recommend not freezing the undipped buckeyes. We did that one year to save space in the fridge, and the condensation on the balls as they thawed messed up the chocolate when we started dipping (water and melted chocolate don’t like each other).

3.) Melt chocolate and paraffin in a double boiler. Test your chocolate by dipping one ball and letting it sit for 5 minutes. If the chocolate has set, your chocolate is ready. Continue to dip balls by using a square toothpick (thick ones). Press toothpick into chilled balls and dip into chocolate leaving an eye opening on top to look like a buckeye. Then, take another toothpick to gently press perpendicular to the toothpick in the buckeye to slide it off onto wax paper.

4.) Chill dipped buckeyes until firm (NOTE: if your chocolate is tempered properly this is unnecessary). Then, line the buckeyes in containers with wax paper between layers and keep in the freezer until ready to serve.

*Note: this takes forever, so turn on a good movie and begin to roll balls—try not to eat too many during the movie.