Archive | Room for Dessert RSS feed for this section

Jan
20
2012
Photo Friday: Guinness (Cupcakes) for Jesus*

The Event: Iron Chef Potluck (ingredient: “spirits”)

The Recipe: Guinness Cupcakes with Irish Whiskey Ganache Filling and Baileys Buttercream

The Verdict: while I announced the following on Twitter pre-baking… “Baking cupcakes filled w/whiskey ganache & topped w/Baileys buttercream. In other words, cupcakes I’m 98% sure I won’t eat. #5YearOldPalate” …I ended up eating…uh, several.

Cake: Loved. Delicious and moist and not Guinness-ey.

Frosting: Liked. A little grainy and definitely Baileys-ey, but sweet enough that I could eat it anyway.

Filling: Not good. The ganache set up too hard (heh-heh) to be a cupcake filling. It was like a solid truffle in the middle of the cupcake and made the cupcakes difficult to eat. I gave my fillings to Dave.

The New Obsession: Developing a signature cupcake recipe. Stay tuned!

*The silly memory these cupcakes bring to mind: Years ago, Dave and I spent St. Patrick’s Day in Philadelphia with friends from college. They were insane. John Boy (don’t ask) kept insisting that the guys drink only Guinness and Guinness-based drinks all night. When everyone else tired of Guinness, John Boy encouraged them to keep drinking it by exclaiming: “Guinness for Jesus!” I laughed so much my face hurt.

Dec
7
2011
Homemade Advent Calendar*

Preparing My Heart for Christ with Belgian Chocolate

I’m sure you’ve all been wondering how I spent my free time in November. I spent it making advent calendars for me and Dave. Heads up for the devout among you, this has nothing to do with preparing my heart for the coming of Christ and everything to do with preparing my mouth for a daily piece of delicious chocolate (sanctioned by Jesus!).

Because I’m a 5-year old trapped in a 38-year old body, I get a Neuhaus advent calendar every year (two because I don’t want to share with Dave). I love the designs on the front and the anticipation of opening the little paper door to reveal my surprise treat each day…until the day when I’m greeted by a piece of dark chocolate. Then my 5-year old palate wrinkles its nose.

In past years, I’ve toyed with the idea of making my own advent calendar so I can fill it with chocolates of my choosing. But I’m lazy and not even remotely crafty.

But early in November, my ADD took over and I searched the internet for homemade advent calendar ideas. Because that was the best use of my time. Oh how my to-do list suffers when I get one of these brilliant “project” ideas.

This homemade advent calendar idea resonated most with me. But I think I might have mentioned I’m lazy? So I thought about buying these pre-made tins on Etsy. But as lazy as I am, I’m also cheap and picky. Since I want to retire early and have super cute tins, I decided to make my own in my voluminous free time.

This is the part of the craft project blog post where I’m supposed to say how easy this project was. This was a raging pain in the ass so easy. I started this nonsense during the first week of November and I didn’t finish until December 1st, which is actually four days after advent started, but who’s counting. Advent calendars always start on December 1st, I don’t make the rules. I stopped counting the time this project took when it reached 12 hours.

Now is the time in the craft project blog post when I’m supposed to tell you how to torture yourself do this.

“High-Maintenance Homemade Advent Calendar” Steps:

1.) Buy shit:  Having no crafting experience, this involved making a non-technical shopping list (i.e. paper cutter thingie, stuff to make paper stick to the tins, way to make numbers appear on the paper, etc…) and losing my Michael’s virginity. The only reason I didn’t leave in a huff when the cashier asked for $99 (seriously?!?) was that I’d already blown an hour and half wandering around the store in a stupor. I was by that point what I like to call committed.

2.) Design and cut (with fancy new circle cutter I can’t imagine ever using again as long as I live) two decorative paper circles for each tin. Curse each time the paper slipped and the cutter created a useless ellipse.

3.) Realize cutting circles out of the paper wastes a ton and return to Michael’s for two more packages.

4.) Tape (using special tape I had to order) smaller decorative paper circles onto larger background circles.

5.) Freak out about something happening to the paper given how much time steps 1-4 took. Research paper preservation products. Select acrylic sealer spray.

6.) Decide not to number the circles. Hope no one ever dares to question this decision. Thank you.

7.) Obsessively worry about my spraying competence and ruining my precious circles. Become frightened by how often the phrase “my precious circles” enters everyday conversation. Find YouTube spraying tutorial and consider hiring a professional spray person. Wonder if inhaling a toxin and the possible subsequent failure of my internal organs is a reasonable response to an aversion to dark chocolate.

8.) Choose the windiest fucking day since Hurricane Irene to spray toxic shit onto the circles. End up shellacking myself (three coats!).

9.) Wash tins. Dry tins. Be completely blown away when this takes two hours.

10.) Find Simon & Garfunkel limited engagement channel on Sirius. Finally learn Art’s harmony on “You Can Tell The World.” Sort of.

11.) Tape circles to tin lids.

12.) Stick magnets to bottom of tins.

13.) Obsessively arrange tins on magnet board. Take many mediocre photos.

14.) Buy chocolate. Feel the need to explain project to store clerk. Ignore her look.

15.) Use a random number generator to randomize the order of the chocolates. If you think I’m kidding, you don’t know me very well.

16.) Insert chocolates into tins.

17.) Eat delicious chocolate daily.

Enjoyable steps include: 10, 13, 14, 15, 16, 17, and portions of 1 and 2.

Cost Comparison

Now is the time when I smugly tell you how much money I saved by doing this myself.

–Two Neuhaus advent calendars = $60 plus tax

–Two sets of premade magnetic tins from Etsy plus a magnet board = ~$120

–“High-Maintenance Homemade Advent Calendars” = $222.57 ($139.01 without the chocolate)

Oops.

Results

So I spent a lot of time making homemade advent calendars that were more expensive than what I could have bought premade. But my calendars are super cute.   

Here are my precious circles waiting to be shellacked. Each one is stuck to the paper-lined cardboard with painters’ tape.

Here are my 24 finished tins on the magnet board. I couldn’t get a good picture of all 48, so use the reflection to imagine Dave’s set too.
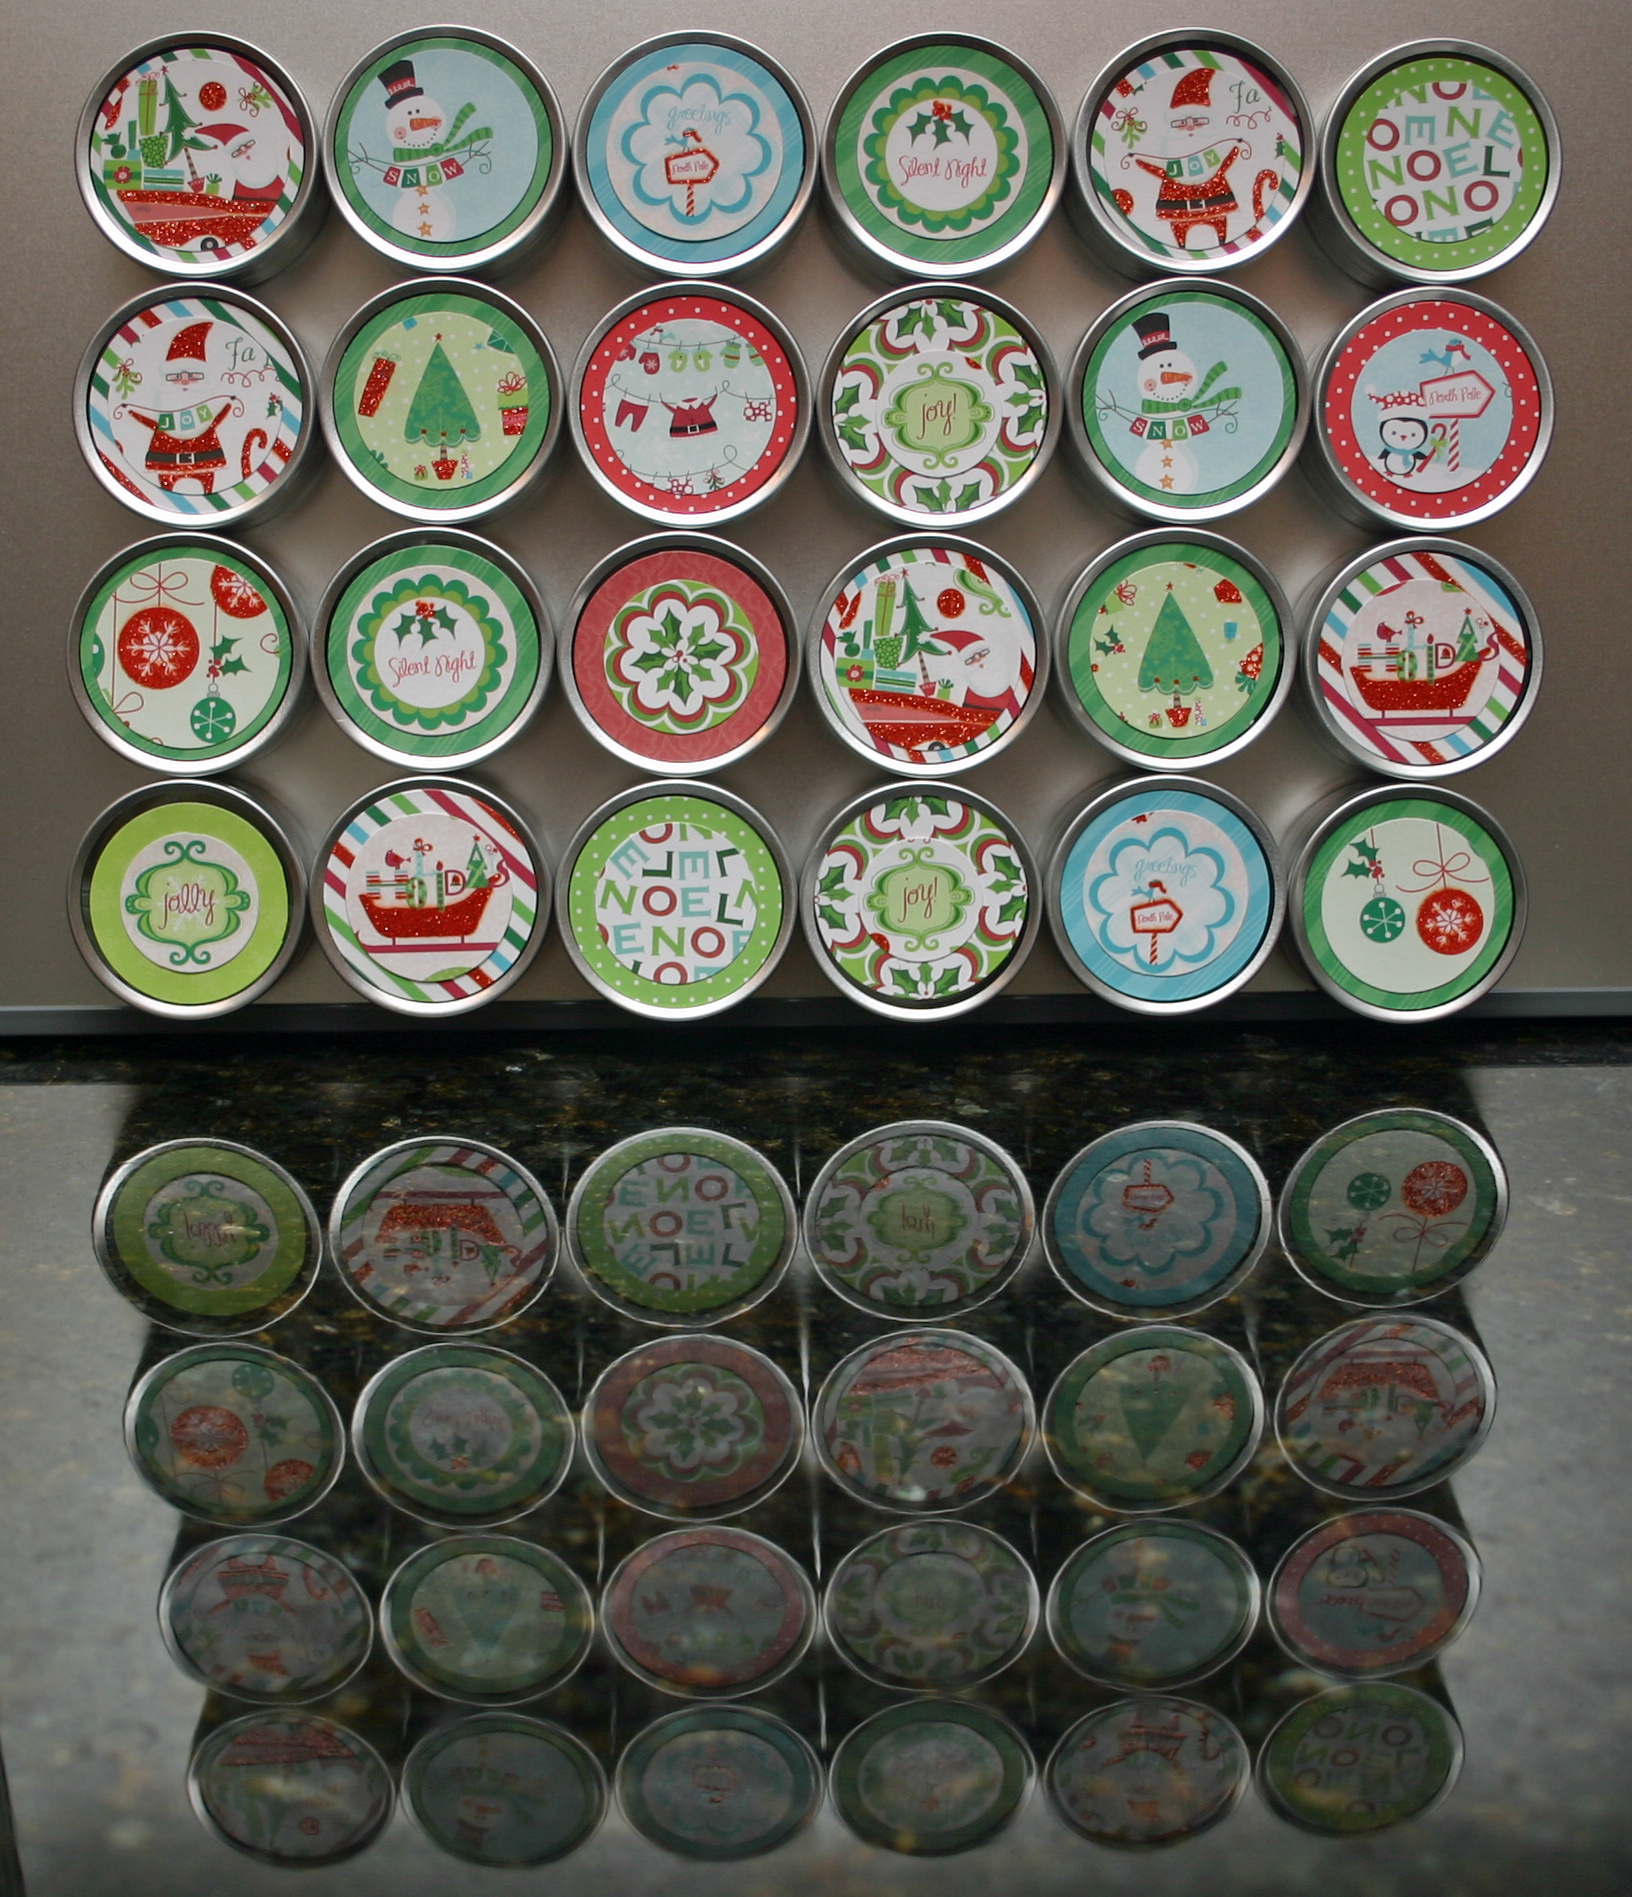
Close up of my favorite pattern.

The chocolate on the left is called Louise and is filled with milk chocolate (of course!) ganache. I think the confetti look is pretty. The chocolate on the right is called Sapho and it’s my favorite. It’s filled with almond praline.

The funky-looking chocolate below is called 1857 and is filled with praline studded with crushed spicy speculoos cookies.

Happy Advent! I hope your holiday preparations go smoothly. Do you do anything special to mark the days before Christmas?

——————————————————–

*I toyed with the idea of naming this post “Oh my God, that’s the crafty shit,” based on the Prodigy song “Funky Shit.” Because I want to, you know, build community with other apathetic agnostic, advent-calendar making, listeners of the Prodigy on the internet. But since I had to explain the reference even to Dave, I decided there aren’t any other apathetic agnostic, advent-calendar making, listeners of the Prodigy. So much for finding my tribe.

Dec
2
2011
Photo Friday: Buckeyes!

Praise all that is holy, this year’s buckeye making is complete.

Buckeye rolling movie: Crazy Stupid Love (I’d give it maybe 2.5 stars? It was good for what it was, silly entertainment to keep my mind off the monotony of rolling buckeyes.)

Yield: 170 (new record)

Elapsed Time: 2 hours, 40 minutes to roll. Almost 2 hours to dip and put away.

Exciting new complications: The dough was softer this year, I was almost able to mix all three pounds of powdered sugar using the mixer and then a wooden spoon. I threw in a little more sugar but it was still soft. I tried to avoid having non-buckeye-like holes in my finished product (see last picture here) by dipping them without skewering them. I used a dipping tool and it took awhile to master it, if I can say I mastered it at all. Many buckeyes dove into the chocolate like it was a swimming pool and they were on vacation (see sad tiny remaining speck of peanut butter filling on the buckeye second to bottom on the left of the photo). My inability to control the dipping process without a skewer and the softness of the dough yielded some freaky little misshapen buckeyes. I also must’ve got the chocolate too hot, because many buckeyes have annoying large “feet” this year. But they don’t have skewer holes in the filling, by god.

Number eaten: 1 as always. Even though they look a little funky and sad, they taste the same as always. They still taste like effort to me though, so the “making buckeyes as diet plan” concept is still effective.

Nov
21
2011
Cupcake Maker, Thy Name is Oven

The future of the corner bakery is at risk. The cupcake craze, in particular, has peaked. Baking at home will never be the same.

You may be curious how I know these things. Well, Sunday I saw this George Foreman cupcake grill at Wegmans and then I knew.

This is a game changer, people. Cupcake-making technology is now available to the home baker!

As you may know, I really enjoy a good cupcake. But who can be bothered to make cupcakes at home? I don’t know about you, but I don’t have that kind of time.

But now, we have a machine that easily molds batter into cupcake shape. Come on, we’ve all been there…you prepare your cupcake batter and painstakingly hand-mold it into a cupcake shape only to have the batter ooze all over your counter when you let go to form the next one. There had to be a better way!

I also never understood how the professionals got that baked consistency. No matter how long I let my cupcake batter sit, the cupcakes never had the freshly baked quality I love so much in a cupcake. Obviously the professionals knew something I didn’t.

Enter the innovative manufacturing company, Select Brands Inc.

They produce small appliances that allow us to “bring the corner bakery into our own kitchen.” Good news for us, bad news for the corner bakery.

I know what you’re thinking. “OK, so the cupcake maker solves my cupcake making needs. But what if I need to make 4 tiny pies?”

Oh yeah, baby.

Surely they can’t have figured out the pie pop?

Think again! Also, pie pop? Huh?  

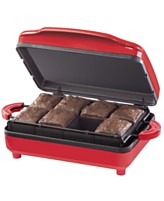
While Select Brands is working hard to solve all of the most difficult challenges faced by home bakers (one self-contained, kitchen-cluttering baked-good maker at a time), they are being left behind in one area. Are you interested in making eight, and only eight, pre-cut brownies, in a machine that does nothing else? Well, Select Brands can’t help you.

But Bella Cucina offers this problem-solving innovation…because pouring brownie batter in a 9×13 pan and then having to cut them into squares ourselves is beyond most of us.

I love the one Amazon review of this product so, so much. Kelli provides a thorough review of this little uni-tasking machine and concludes, “After trying this device, I could just as easily have turned on the oven & baked a full batch in a pan faster. Frosted them when cool & cut them.”

Whoa! What is this oven thing of which she writes?

Kelli also laments the difficulty of cleaning her brownie maker. Pshaw! As a happy customer rhapsodized in a review of the revolutionary whoopie pie maker, “Are you kidding? For the price this is fabulous.” At these prices ($29.99, but currently on sale at Amazon for $19.99!), why clean them? They’re practically disposable, just buy a new one for each batch!

——————————————-

This post was inspired by this week’s Studio 30 Plus prompt:

“And then I knew…”

I made two batter, everything but the kitchen sink brownies (I threw Twix bars in them!) over the weekend for National Family Pajama Night. Recipe, photos, and review coming soon. If only I’d had the brownie maker (then I could have wasted over half of the batter! A picture of me, Dave, and (poor tortured) Chuck in our PJs will be this week’s Photo Friday.

Nov
4
2011
Photo Friday (and Recipe!): Toblerone Shortbread

Are any of your family members living away from home? Do you imagine them lonely and longing for homemade treats?

Maybe you want to send them a care package, but don’t know what might ship well?

Perhaps you are lazy, but want to seem giving and skilled at baking?

Make Toblerone Shortbread!

I settled on this recipe for my oldest nephew’s first college care package last year. I figured shortbread would be sturdy and not subject to getting stale while in transit. And there are four Toblerone bars on top and I love Toblerone. In fact, I’m angry with myself for not thinking of adding Toblerone to a baked good myself.

I had my first Toblerone bar in Geneva during my college study abroad semester. I also left my roommate alone in a 40-year old man’s hotel room in Geneva. Alone in the hostel that night, sleep didn’t come easy (although it should have because I didn’t have to hear my roommate’s horse-like snoring) as I imagined what I’d say when calling her parents to inform them their daughter was missing. Or chopped up into bits, which would now, ironically, be an appropriate size for sprinkling on top of shortbread. Luckily she came back unscathed the next morning and I can focus my memories of Switzerland on what is really important–chocolate.

The hardest part of this recipe is getting the dough evenly spread in a 9- x 13-inch pan. I always give up and have thinner edges. These edges are unattractive and thus have to be cut off and eaten by the baker. It’s a rule.

As it turned out, my nephew had never had Toblerone before I sent him these bars last year and he loved them. So I made them for him again last weekend, because I’m giving and skilled at baking. And I’m childless and want visitors when I’m in the nursing home.

RECIPE

Candy Bar Shortbread from A Passion for Baking by Marcy Goldman

1 cup unsalted butter, softened

2/3 cup sugar

2 1/4 cups all-purpose flour

pinch salt

4 (3.52-ounce) Toblerone bars, coarsely chopped

1. Preheat oven to 325 degrees. Ms. Goldman says to stack two baking sheets together and line the top sheet with parchment, but I don’t do that because it’s crazy. But you go ahead and do what you have to do.

2. In a mixer bowl, cream butter and sugar. Add flour and salt and mix to make a stiff dough that does not quite hold together.

3. Pat dough into a 9- x 13-inch pan lined with parchment paper (I make the parchment paper into a sling that I can then use to pull the bars out of the pan for easier cutting). Curse when you are unable to spread the dough evenly across the whole pan.

4. Bake until lightly golden (get ready for the best part…), 25 to 40 minutes. Get annoyed that she gives you a FIFTEEN minute range in baking times and make a snide comment to your husband about recipe development.

5. Sprinkle chopped Toblerone on hot uncut shortbread.

6. Let set for about 5 minutes and then spread melted Toblerone over shortbread (I use a small offset spatula).

7. Cut into small squares (I usually get about two dozen, including the thin edges I eat myself).

8. Put cookies in the fridge or freezer to set up.

I always become alarmed at the way the Toblerone oozes off of the cut shortbread edges, so I use the parchment paper sling to slide the cut bars back into the pan before putting the whole pan into the fridge. Of course, then I sort of have to cut the bars again, because the Toblerone spackles the cut bars back together as it hardens.

Pack the cookies and a couple of extra Toblerone bars and send to your ungrateful nephew who’s having far too much fun at college to ever acknowledge the arrival of a package.

Forget to take a picture of the finished bars before you pack up all the good-looking ones. Share a picture of a homely edge piece.

Nov
1
2011
Winter Cauliflower

It was a delicacy we had only once, but my family still speaks of it decades later. Mom’s cauliflower goo was before its time. Today she could call it “cauliflower mash,” an ingenious carb substitute!

In my pre-FoodTV youth, overcooked (and/or canned) vegetables were the norm. My family hadn’t even tried Chinese take-out yet. But my Dad, brother, and I knew something was wrong with this cauliflower. While the florets on our plates looked in tact, they dissolved on contact with the butter knife.

“What’s up with this cauliflower,” we asked.

“I don’t know. It must be winter cauliflower,” Mom replied.

She’s still trying to live down that creative excuse.

Over the years, we’ve added other stories to the lore of Mom’s innovative cooking. She hates cooking. Cooking wasn’t going to get much attention.

Salads consisted of lettuce leaves barely cut or ripped, often too large to shove in your mouth. I haven’t eaten a salad made by my mother in almost twenty years, but I still call non-bite size pieces of lettuce “Mumsie lettuce,” an obnoxious yet amusing phrase coined by my Dad. Even my husband says it now, which really fries Mom’s ass. Once again, she was before her time. Today, countless restaurants cut iceberg into huge wedges, throw some blue cheese on top, and call it cuisine. Annoying, because if I wanted to have to cut my salad, I’d eat at Mom’s.

Mom can cook. I still remember her mac and cheese fondly. She makes good stuffing too. I look forward to her (green-frosted) orange cookies every Christmas (probably the only reason I avoided contracting scurvy as a picky child). No matter what the proliferation of cooking shows implies, we can’t all be accomplished chefs. I don’t like to cook either. The kitchen in our temporary rental house during high school probably still smells like the burned Rice-A-Roni I forgot I was making one afternoon. I took the saying about pots literally. Who can be bothered to watch a pot boil anyway?

Photo credit

RECIPE

Winter Cauliflower

Remove outer leaves and core from a head of cauliflower. Cut into florets.

Add 3 quarts of salted water to a saucepan and bring water to a boil. Add cauliflower florets to the boiling water.

Boil florets for 10-20 minutes or until cauliflower no longer has mass.

—————————————————-

This week’s RemembeRED memoir prompt:

“Take me back…whether to a month ago or decades ago.

Share with me a special recipe, but don’t just list out ingredients.

Take me there…in 500 words or less.”

Write on Edge: RemembeRED

Jul
29
2011
Photo Friday: Cupcakes I Didn’t Eat

Dave and I went to a members-only celebration for the Kids’ Farm at the National Zoo last Sunday morning. We like the zoo, but it was supposed to be 8 million degrees that day and Kids’ Farm implied many, many children. But there would also be free Georgetown Cupcakes. We have our priorities.

We stood in a long line, sweating. We got a free peach, a buy one get one free card from Chipotle, a cookie from Firehook, and…Georgetown Cupcake ran out of cupcakes TWO PEOPLE AHEAD OF US. This wouldn’t have been so bad if I hadn’t watched a grown man take his free cupcake, use the wrapper to scrape off all the frosting, and then eat only the cupcake. Dude, if you don’t want it, give the damn thing to me. Freak.

We went to 2Amy’s for lunch after (finally got to try their donuts, they were just OK, not sweet enough for me). We got there a few minutes before they opened so we stopped by a little cupcake place across the street while we waited. They were kind enough to let me take a picture. Even though the cupcakes looked very good, we managed not to buy any. I thought we’d go back for some after lunch, but we were too full. Maybe next time…here is the only good picture I took all day and the closest I got to a cupcake.


Jul
9
2011
Mississippi Mud Bars

Years ago, I got some sample Mr. Food ooh-so-easy Recipe Collection cards in the mail. The free cards were supposed to entice me to purchase the rest, but I simply kept the one for Rocky Road Fudge Brownies. I remember liking them a lot and they were quite easy to make since the recipe used boxed brownie mix and mini marshmallows.

I’m snobbier about my recipes these days. I recently got a great new baking cookbook called A Passion for Baking by Marcy Goldman. The Candy Bar Shortbread recipe (topped with Toblerone) was worth the price of the book by itself. But when I flipped through the book and saw the photo of Mississippi Mud Bars, I became obsessed. The picture looked sinful and I was dying to try them. They were like Mr. Food’s recipe only completely from scratch, so they had to be better, right? Plus, the description asserted “this is a definitive, perfected version.” Alrighty then!

But I never seemed to have an appropriate occasion for making them. Dave and I need to eat a whole pan of these things like we need a hole in the head. Over July 4th weekend, we were invited to an all-American themed potluck and cookout. Yee-ha! Mississippi is American!

MY NOTES ABOUT THE RECIPE (also noted below with *)

These were pretty easy to make. There is some chilling involved before you can frost them, so you need to schedule for that. I also had to buy a new pan (11- x 7-inch), a size I haven’t needed before this recipe and don’t see needing again. The pan looked so wee, but it produced plenty of bars. Goldman, for reasons I don’t fully understand, likes to blend batters and icings in a food processor. Apparently she is not aware of how annoying my food processor is to clean. I used my mixer.

The most difficult part was getting the bars out of the pan since I didn’t want to cut them in the pan. I was able to get it out onto a cutting board in one piece using a big spatula after loosening all sides with a plastic knife (didn’t want to scratch my brand new pan). If I ever make these again, I’ll line the pan with a foil sling to make removing the uncut bars easier. I made Dave cut them since getting 32 bars out of an 11 x 7 sized slab of marshmallow-spackled and frosted brownie was a messy game of Tetris I didn’t want to play.

Dave and I each tried one still cold from the fridge and they were so sweet I felt stoned. I have a very serious sweet tooth, and these things were approaching too sweet even for me. The comments I got at the potluck seemed to signal the same thing–over the top rather “ooh, it’s so good” (to steal Mr. Food’s phrase). They tasted considerably better to me once they came to room temperature. So even though they are very messy, I strongly suggest NOT serving them cold.

RECIPE

Bars

2 cups sugar

3/4 cup unsalted butter, cut into chunks

4 large eggs

2 teaspoons pure vanilla extract

1 1/2 cups all-purpose flour

1/3 cup cocoa powder, measured and then sifted (*I refused to sift a third of a cup of cocoa, I mean…seriously)

3/4 teaspoon baking powder

pinch baking soda

1/8 teaspoon salt

1/2 cup chopped walnuts, optional (*I used and would strongly recommend otherwise there will be nothing blocking the sugar rush from killing you)

1/2 cup semisweet chocolate chips (*I used my new standby, Hershey’s semisweet)

1 1/2 cups shredded coconut, optional (*didn’t use)

1 (7 oz) jar marshmallow creme

Icing

3 cups powdered sugar (*I ended up blending in close to 3/4 cups more because it just didn’t seem to be getting sufficiently stiff (heh-heh))

1/2 cup unsalted butter, softened

1 teaspoon pure vanilla extract

1/2 cup cocoa powder, measured and then sifted (*sift if you want, see if I care)

1/2 cup evaporated milk

Steps

Preheat oven to 350. Generously spray an 11- x 7-inch pan with non-stick cooking spray and place it on a parchment-paper lined baking sheet (*the author has her reasons for this which I don’t think are necessary, but I did it anyway because I worried the batter might spill over–it didn’t).

Blend sugar and butter until pasty. Add eggs and vanilla; blend well. Fold in flour, cocoa, baking powder, baking soda, and salt and blend well. Fold in nuts, chocolate chips, and coconut (*ick!) and blend briefly. Spoon into prepared pan.

Bake until set and firm to the touch, 25-30 minutes (*I baked close to 30 minutes and wish I’d done a little less). Spread marshmallow creme on hot cake and refrigerate, uncovered, 3 or more hours.

For icing, blend all ingredients until stiff and glossy. Using a metal spatula, spread icing on chilled uncut bars. Chill to set icing. Cut into bars (*good luck with that!).

Jun
24
2011
Photo Friday: Bowl O’ Cookies

Dave decided we shouldn’t go to his family reunion empty handed. I have no clue about the etiquette for this shit, but I tried to talk him out of it. We don’t have time in the evenings during the week, especially the week before we take vacation days. Whatever we bring also has to travel 10 hours with us. Plus, I was certain his sister-in-law, baker extraordinaire, would have it covered. Perhaps I shouldn’t mention that the blondies I took to the reunion last year were the last thing to go.

Anyway, he insisted on making cookies.

I just made Perfect Chocolate Chip Cookies for Memorial Day, so I made the fateful suggestion of trying the family recipe my friend posted in the comments on the Perfect Chocolate Chip Cookie review. A recipe we haven’t tried before. At 10PM the night before we are leaving. When we aren’t packed. And writing this is also a good use of my time, but I digress.

Dave doubled the recipe for a greater yield when he made the dough last night. But tonight, he didn’t so much feel like baking anymore. So he decided to make them massive so he wouldn’t be baking all night. He also didn’t grease the cookie sheets or line them with parchment. I suppose I should’ve kept an eye on the proceedings, but I worked from 8AM until 8:30PM, so I was eating my dinner and staring glassy-eyed at the TV while Dave made these decisions.

Would you like some cookies?

They’re the cookies that eat like a soup! They have a lovely flavor, but they are very flat and delicate, in addition to being stuck to the pan and undercooked. He’s trying to adjust the later batches, so hopefully we will have a yield greater than zero.

I find this really amusing, probably because Dave is so skilled at cooking while I’m just not. So I’m happy I can feel superior about baking.

My apologies to Erin’s husband’s family for desecrating their childhood cookie.

Jun
7
2011
Of Picnics And Plateaus

Before I got married, my work colleagues threw me a party. One of the gifts was an insulated picnic backpack, which we never used until years later, after we adopted Chuck. Our first Memorial Day with Chuck, Dave suggested we have a picnic by the Potomac. The first picnic consisted of a very long walk to the picnic site, Dave’s homemade goopy brownies, and lots of Rolling Thunder.

Since 2005, the Memorial Day weekend picnic has been a tradition.

Dave’s picnic idea was brilliant. You see, I have a problem. I’m very good at planning, but I’m not so good at being in the moment. Several years ago I remember laughing out loud while watching an episode of “Inside the Actors Studio.” I think Ed Harris was talking about what it was like to work with Marcia Gay Harden in “Pollock” and he said that she was a great actress because “she was present.” That seemed like the stupidest thing I’d ever heard, of course she was present, how else could she have been in the movie? But now I sort of know what he meant.

This annual picnic is one of the few times I can think of when I just let myself be in the moment and relax–be present, if you will. We hang out on blankets, eat Dave’s delicious food, drink celebratory fizzy beverage, look at the water, watch Chuck eating his special treat, and coo over how adorable he is. For once, my mind isn’t somewhere else. I’m not watching the clock, wondering how long this is taking, worrying about my to do list and what I’m not doing because I’m doing this, or planning what I should do later.

The feeling I have during the picnic is glorious and I have to figure out how to feel this way more than a few hours per year.

Dave is a kick ass picnic provider. It’s one of our “cheat” occasions, when we don’t really worry about what we eat even though we both want to lose weight. This year, the menu consisted of:  lemon rosemary lamb with tzatziki, grilled zucchini, and Mediterranean orzo salad with feta vinaigrette (not pictured: sparkling lemonade, my Perfect Chocolate Chip Cookies, and a frozen Kong for Chuck).

Here is this year’s portrait of my special little family.

Since part of the tradition is taking pictures, this means we have pictures of us around the same time every year. Given the title of this post, you may see where I’m going.

I’ll start with the good news, a set of before and after pictures. On the left is my not so glamorous before (this photo makes me cringe) at my highest adult weight ever. On the right is my glamour shot from this year.

I know these shots aren’t set up the same, but there are almost always differences in before and after pictures that aren’t related to actual weight changes. Have you ever noticed how miserable the person looks in their before photo? The before never involves good hair or a smile, while the after photo involves both. At least some of the difference is attitude.

I wasn’t at all pleased with the way I looked on the left. I threw my hair back and put on a hoodie to cover myself even though it was hot. And I gave Dave a stupid look assuming I’d just delete the picture.

In the after, I’m much happier with how I look. I bothered to do my hair and wear something a little more photo-ready. And I smiled and posed in a not totally hunched over trying to hide myself way.

But there’s also a 15 pound difference. Trust me.

So what’s the bad news? The picture on the left was taken three years ago. I lost the 15 pounds between 2008 and 2009. Since August 2009, my weight has stayed stubbornly the same.

Don’t get me wrong, I am thrilled I’ve kept the weight off for two years. But I wasn’t done. I have been actively trying to lose a little more the whole time. Since August 2009, I trained for and completed: two 5Ks, a 10K, two 10-milers, and a half marathon. While I can’t prove causality, the amount of exercise I do points to my problem being diet. Fuck.

In the weeks before Easter, Dave and I tried eating based at least loosely on the Primal Blueprint. We didn’t follow it religiously (for example, we didn’t give up dairy), but it was still a pretty drastic change, particularly the no added sugar thing. But it wasn’t as hard as I thought it would be and I lost about 3 pounds pretty quickly.

But then Easter happened. I planned on having a free for all over Easter for about a week, but the Easter chocolate joyride lasted a full month, courtesy of my miscalculating how much chocolate we could consume during my Mom’s visit and my Mom bringing more than we had requested. By the time the carnage was over, those 3 pounds were back and it was time to plan the Memorial Day picnic. I made cookies and had a cookie every day for a week until they were gone.

I have a special occasion problem. And there’s a special occasion ALL. THE. TIME.

Valentine’s Day, Easter, Memorial Day, July 4th, my birthday in August, Dave’s birthday in September, our anniversary in October, Thanksgiving, Christmas, Mom’s visiting, I’m on vacation, I had a tough day at work, I had a good day, it’s a full moon on Tuesday.

I don’t want to live in a world in which I can never have another cupcake, but it’s way too easy for me to justify a treat.  There has to be a happy medium somewhere and I need to find it. Because it’s crazy to run the distances I have run over the past two years only to support a cupcake habit.

How often do you justify treats?